Welcome back. This blog has been needing an update for almost three years now (oops). Car work never stopped, but as I had less time, I stopped updating the blog. Long story short, it drives now! In fact, it drove, it broke, it drove again, broke again, drove… Well you get the idea. It will take me a while, but I will be documenting the process still with posts over this summer. While waiting to bring the blog up to speed on the major steps that brought the project to completion (although it’s never really complete), I’ll write some small posts about some of the minutia going on right now.
To tide you over until the actual posts come out, here’s a teaser video hehe
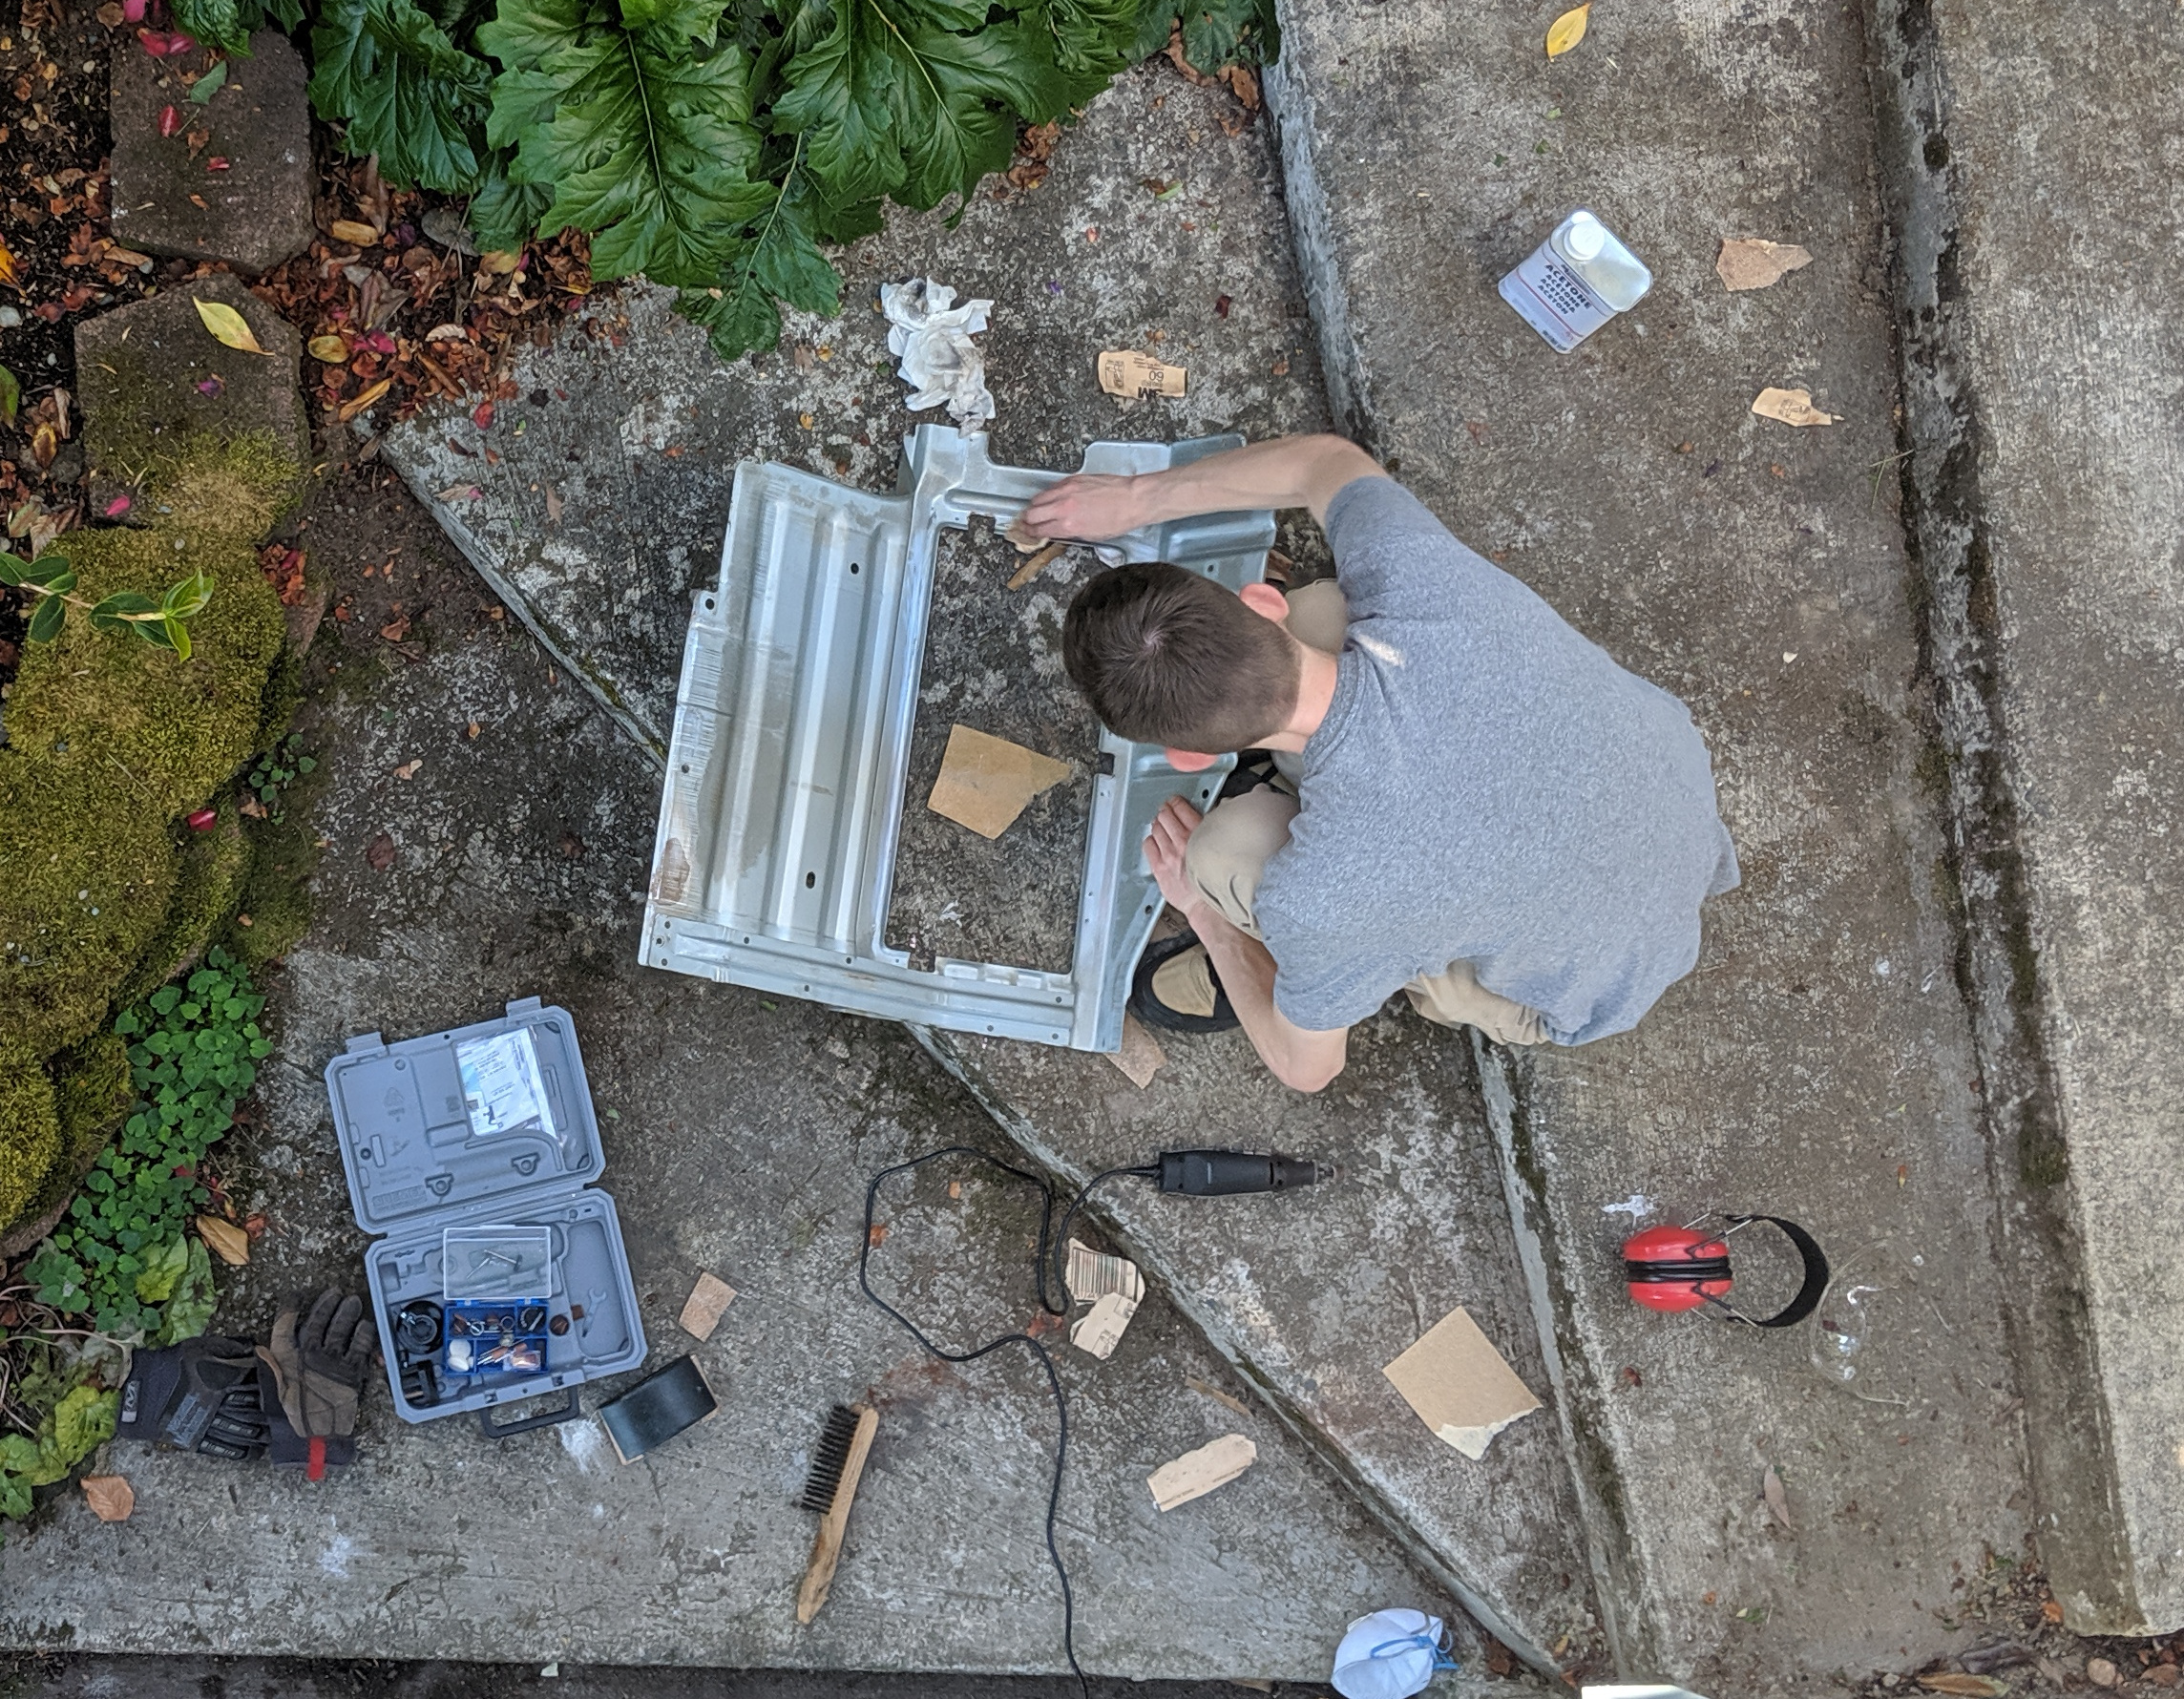
I have slowly been checking of small projects related to getting the car restored. The most disgusting part of exposed subframe was directly behind the seats. In addition to there being a mess of factory wire harness sticking out, some of the old smelly and water damaged insulation mat was still sitting exposed. This area previously held two storage containers (which also had some gross water-damaged carpet). My goal was to make all of the parts that used to cover this area clean enough to be reinstalled to cover up the wiring. Remove the old insulation, then the panels would just be bolted back on, and the panels reinstalled with the storage containers. Easy, right?
The panels were badly rusted and needed to be restored. Also, they used to be covered with carpet, but I wanted to try to avoid putting carpet back into this part of the car. The plan was to paint them to a nice finish so they didn’t need to be covered by anything. I had just planned to give them quick coat of PlastiDip (because it has a nice satin finish and is electrically isolating). But I felt wrong just painting over the rust on the panels, I knew the coat wouldn’t last. So I jumped headfirst down the rabbithole and got to sanding.
 The struggle begins.
Four full sheets of sandpaper, three ruined Dremel bits, and a dusty palm sander later the rust was off. It took about three hours, and by the time I had finished both panels it was to dark outside to paint. One day project was now two.
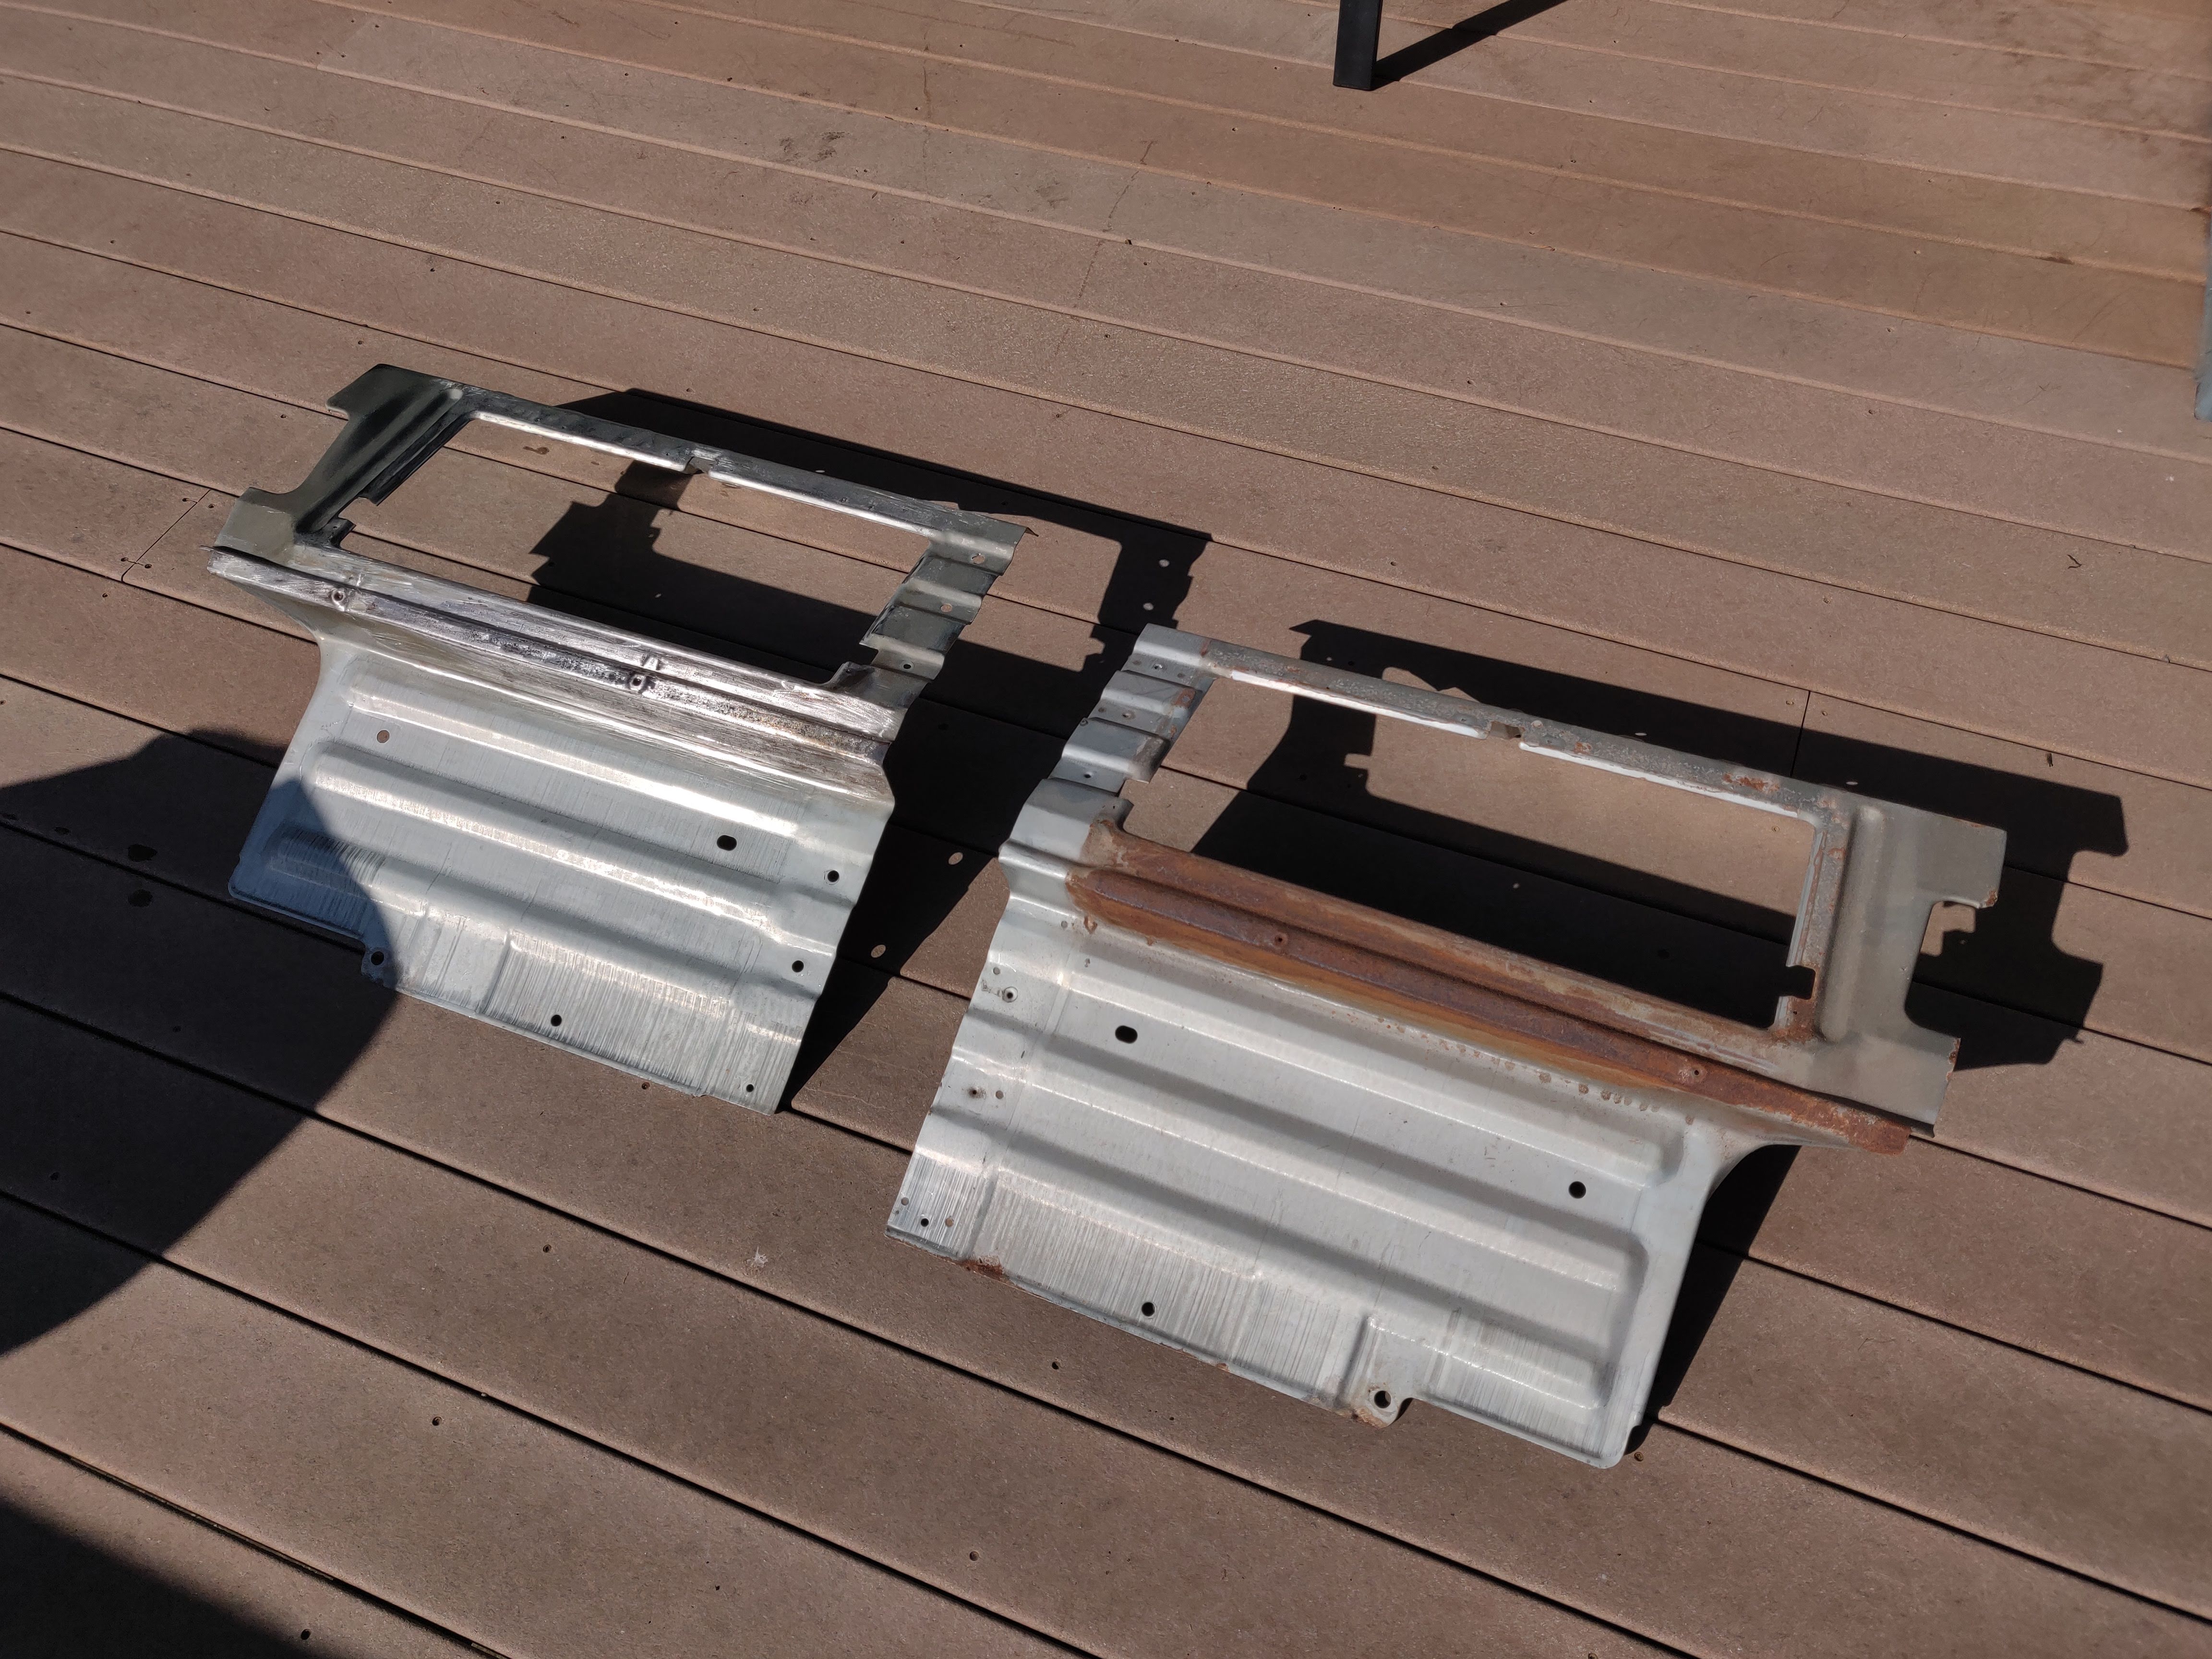 On the right is the rusted out interior panel, and on the left is the freshly cleaned panel.
While I waited for the sun to come back, I checked out the damage on the storage bins. I quickly gave up on cleaning the carpet and decided it needed to be replaced. I designed new brackets in CAD that would utilize the existing carpet pinning as attachement points to hold a sheet of polycarbonate to be the new floor of the storage container. These didn’t take too long to make, and this part pretty much went to plan (imagine that). I threw a nice coat of paint on the polycarbonate sheets to give a nice “piano black” gloss finish and called it good. I couldn’t have been happier with the end result, they look like they came straight out of a Tesla.
 Painting the back of the polycarbonate. I picked up one of the spray paint grips after my hand started cramping.
The next day I had dry sanded panels ready to paint. I went with PlastiDip over normal spray paint for a couple reasons. First, it is electrically isolating, and now that there are some high voltage wires in that are of the car, I felt that this was a safer option. Second, PlastiDip doesn’t need a clear coat to get a really durable finish the way spray paint would (I’m sure you could with some spray paints but I don’t trust them as much). Also the satin black finish of PlastiDip looks real nice in my opinion. Four-ish coats later, the panels were looking great and ready to be reinstalled.
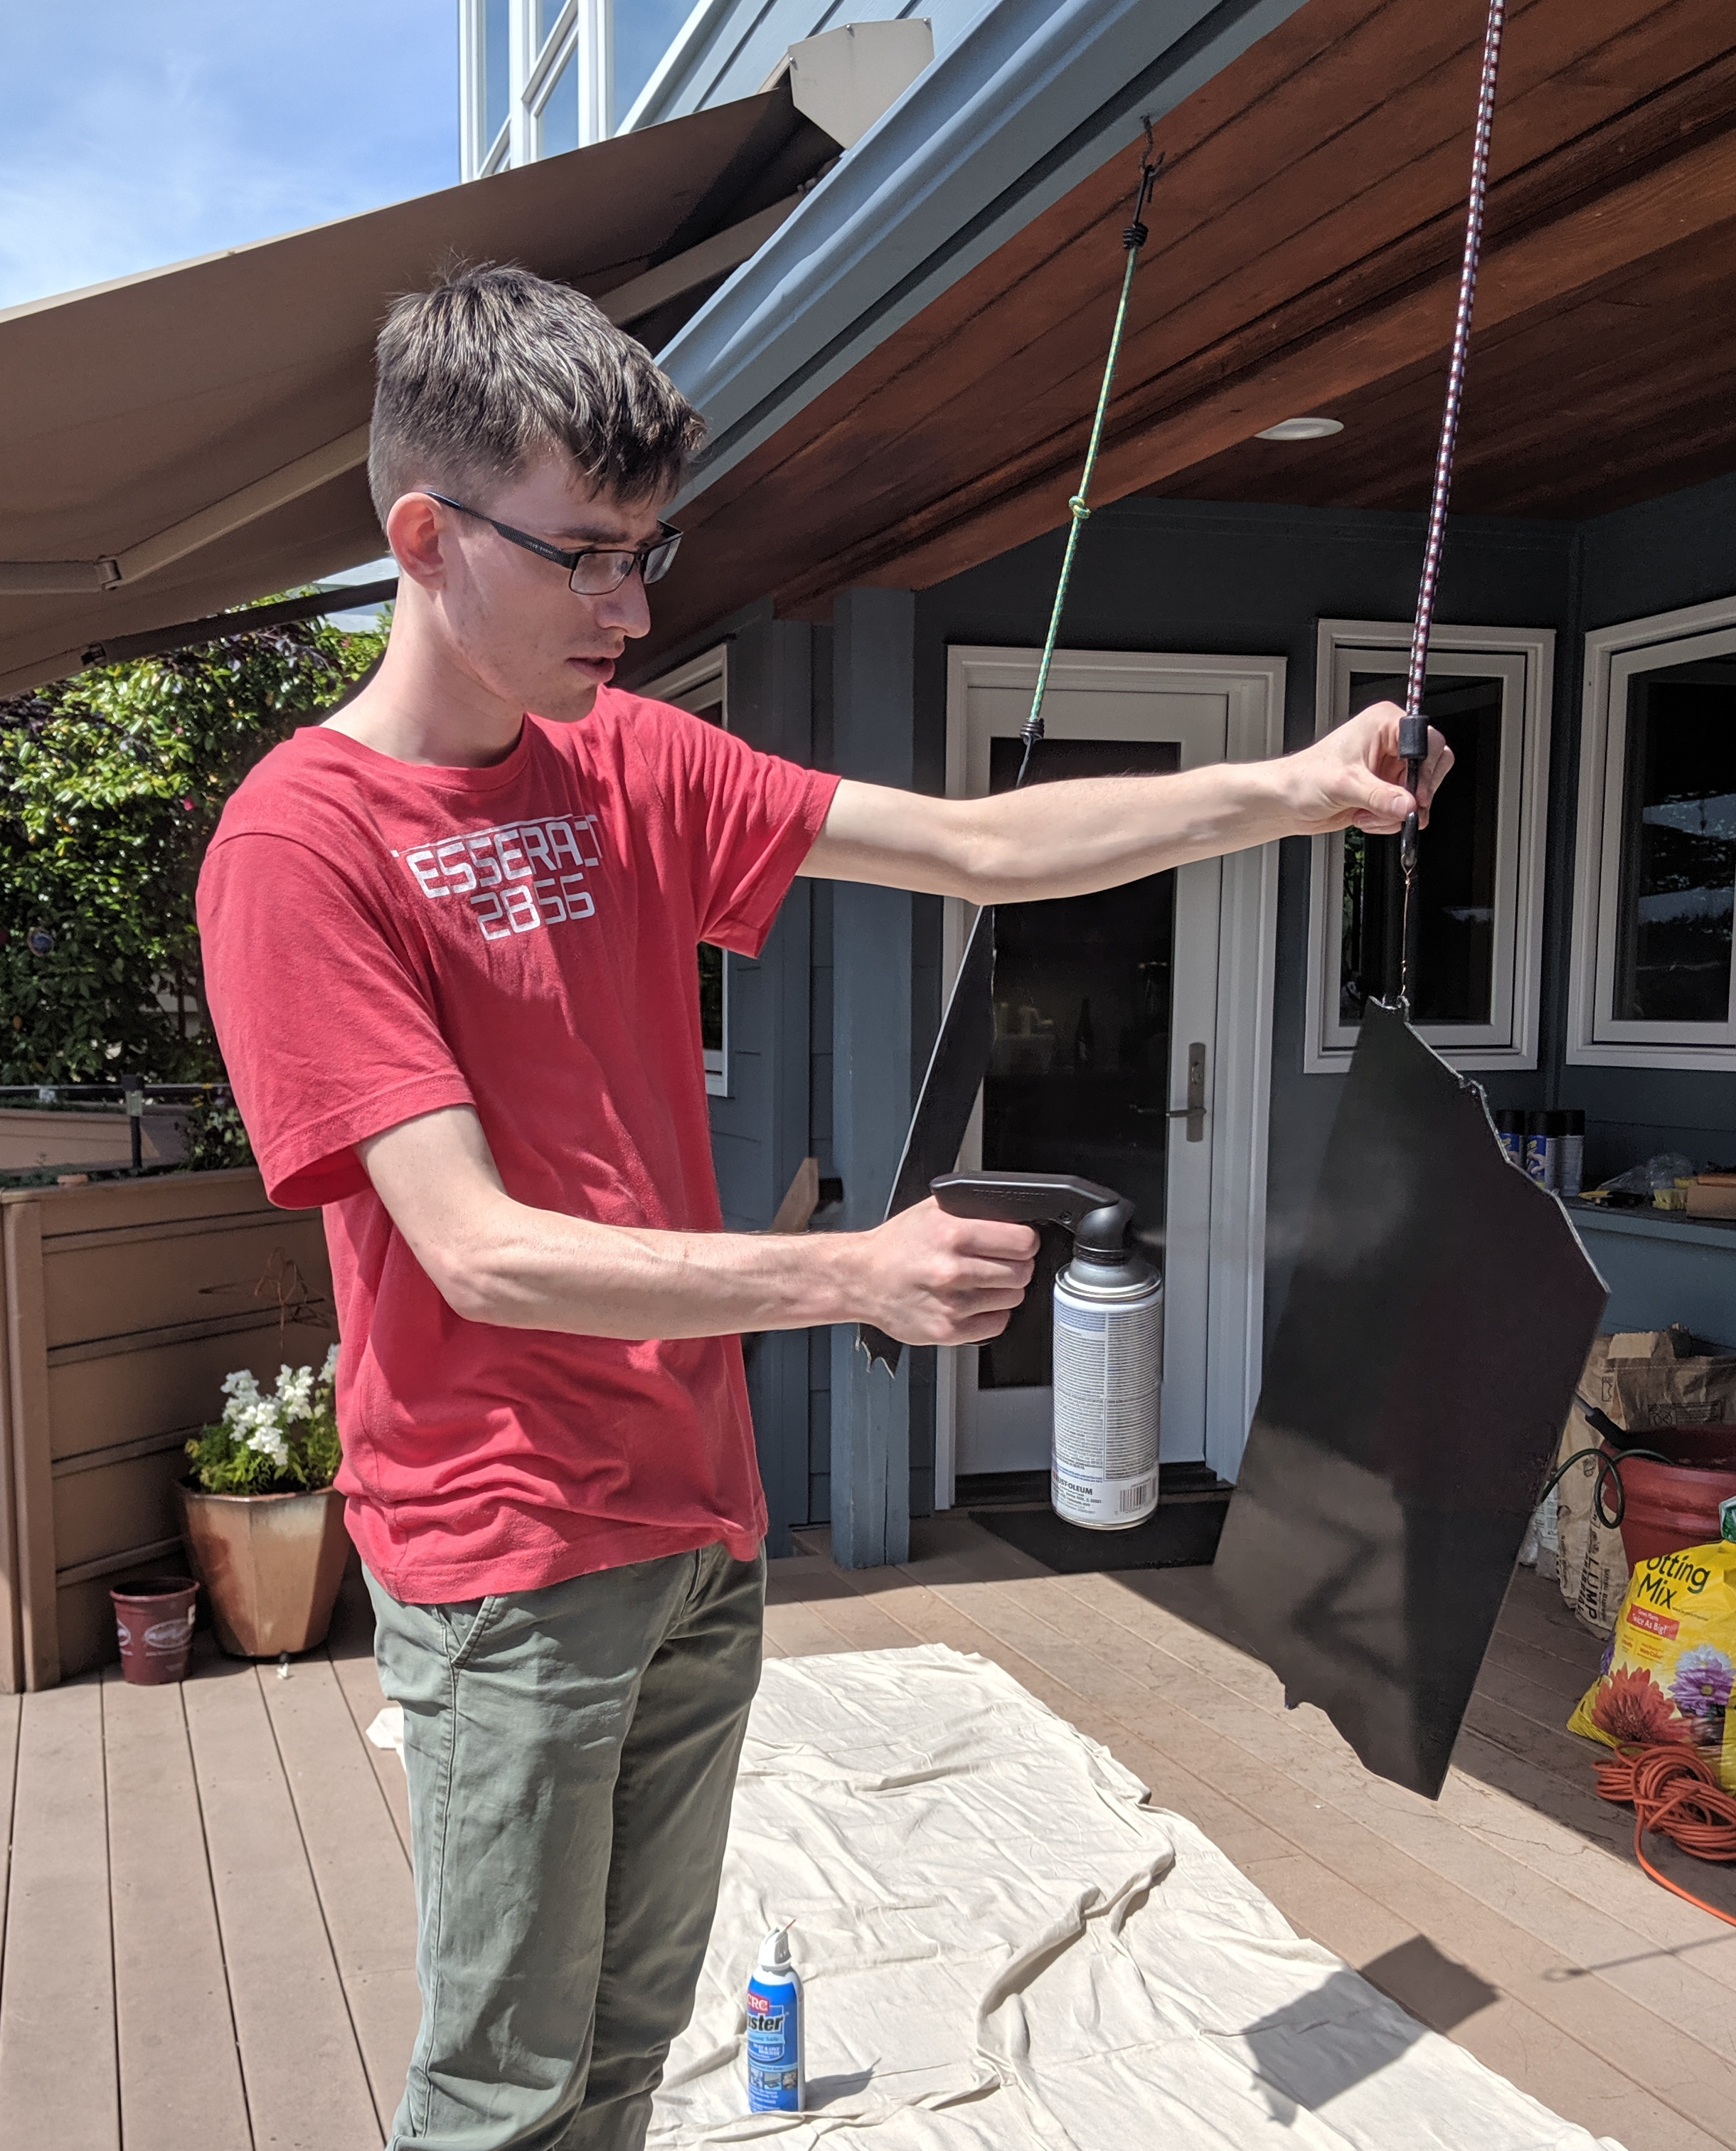
 My makeshift paint setup. The panels were hung from the roof gutters by bungy cords. Suprisingly effective.
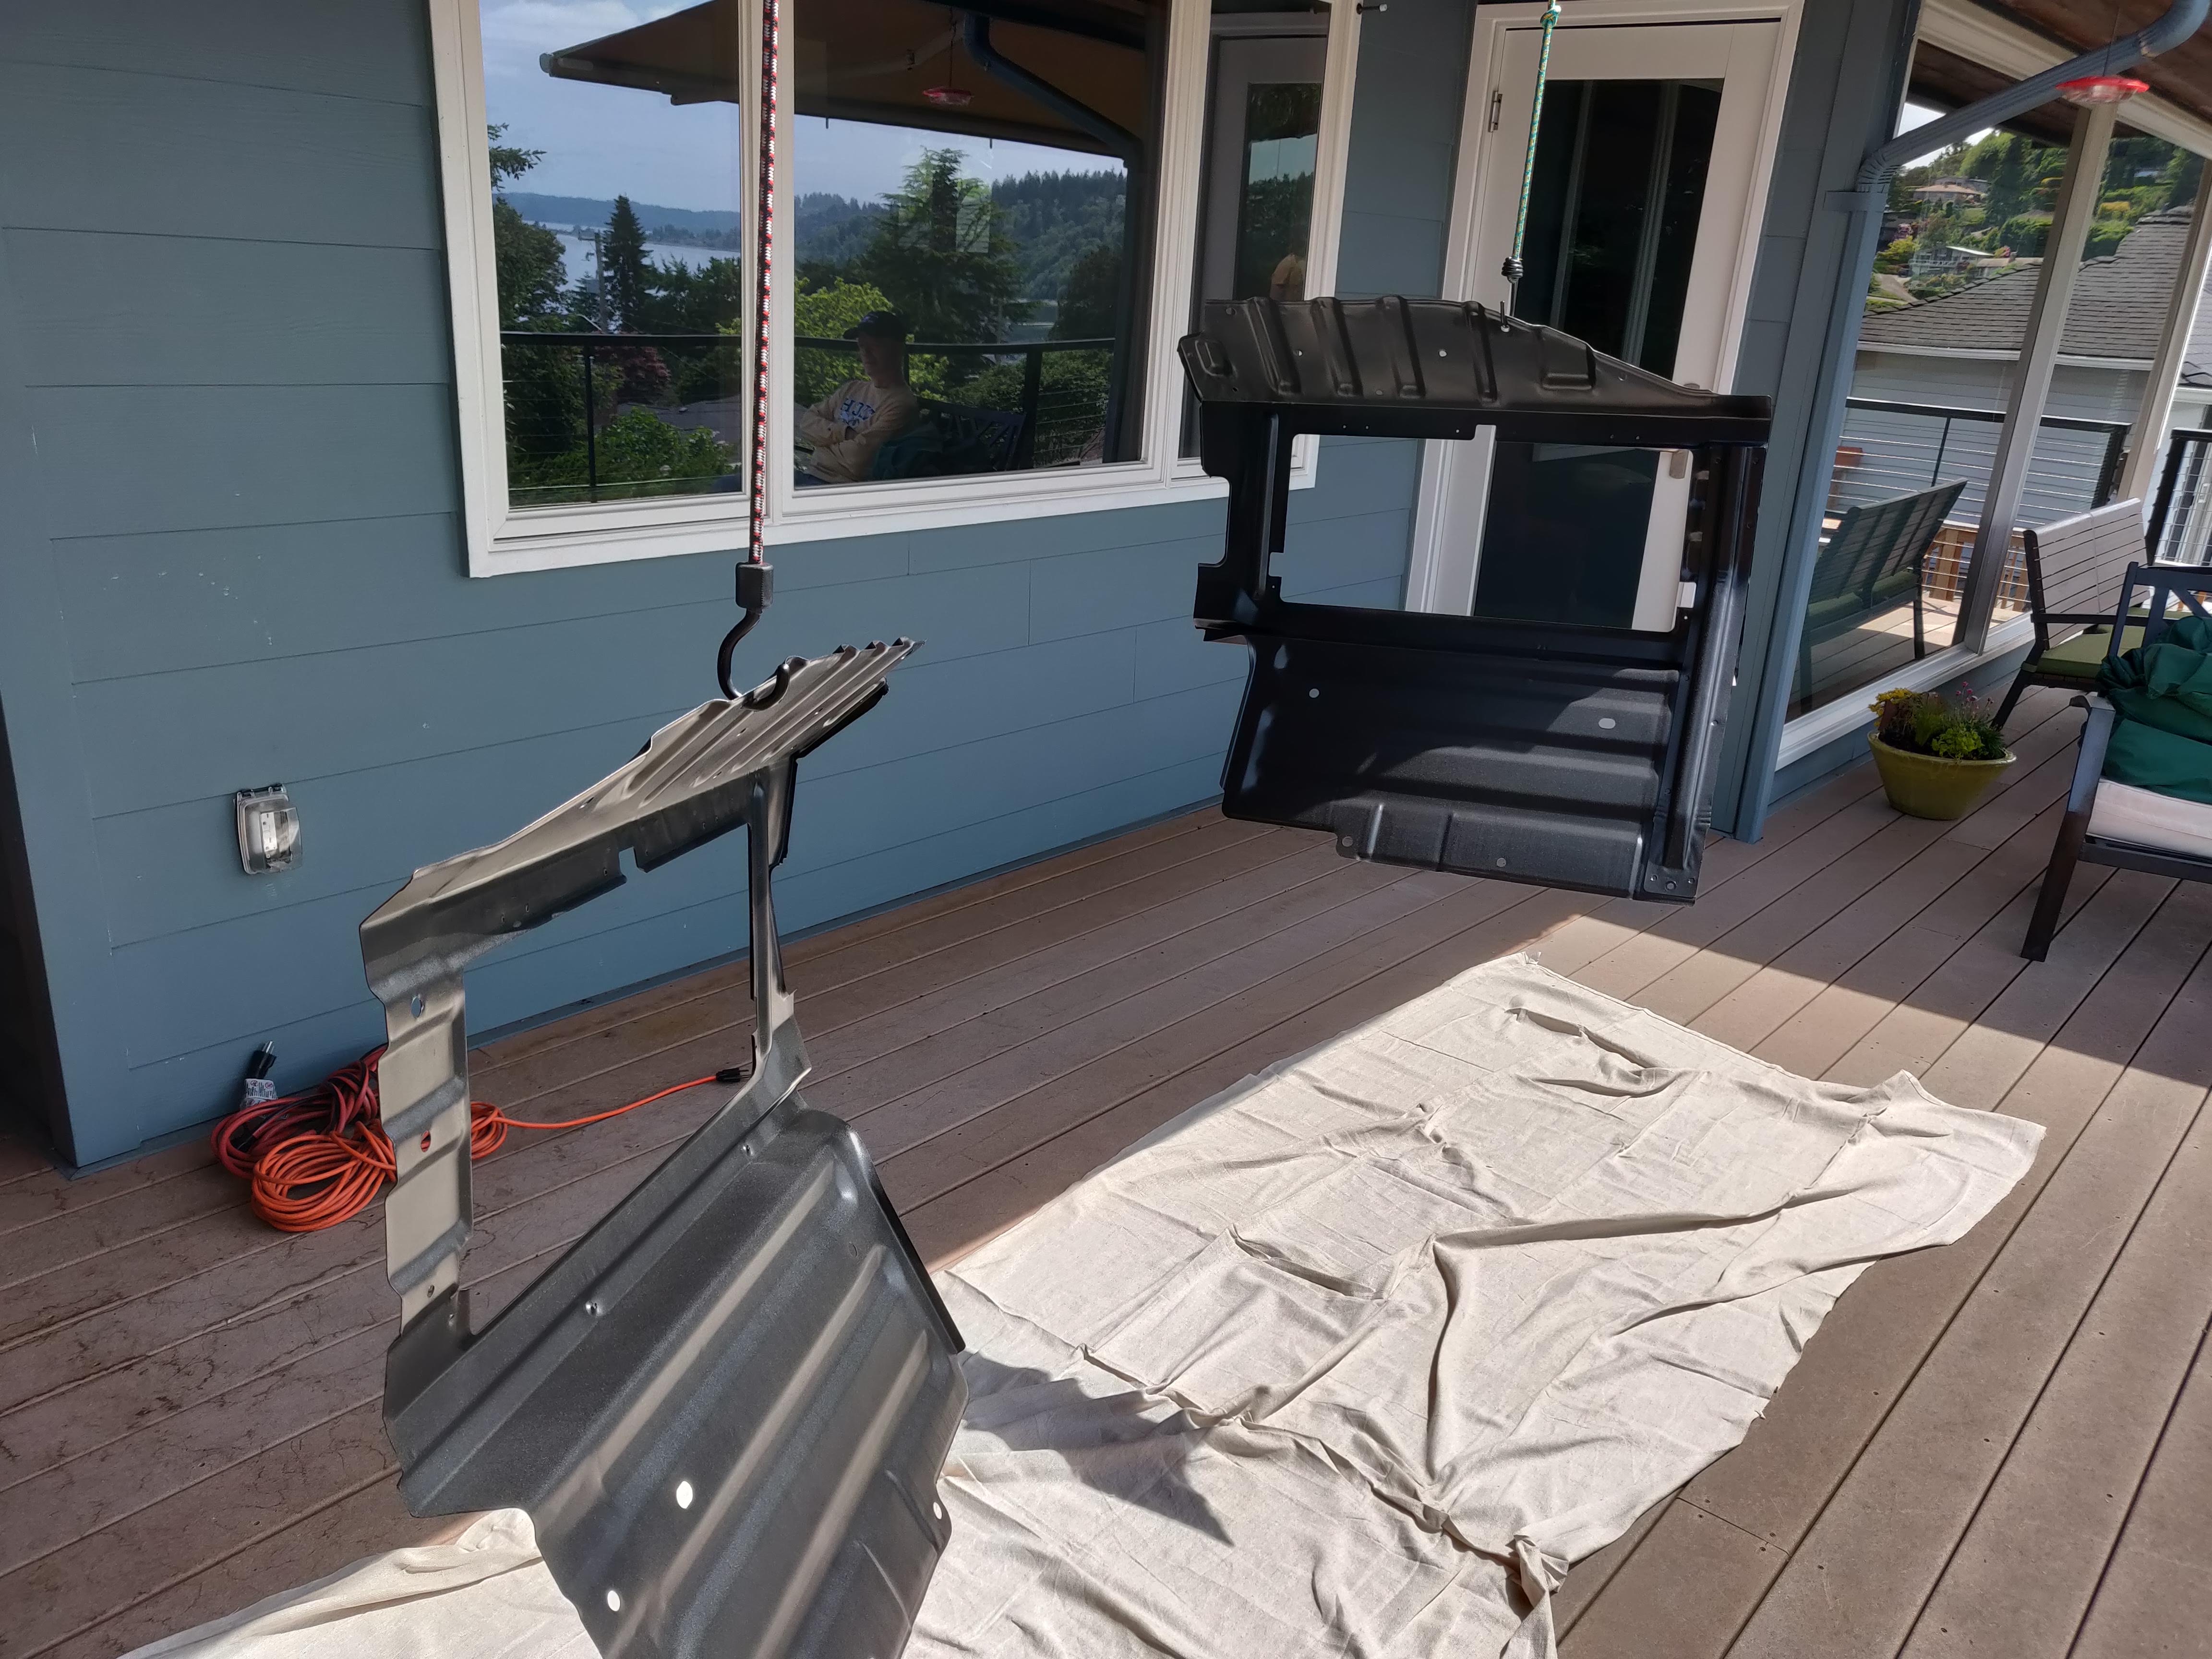
 Panels layed out as they will be reinstalled into the car.
Done! Project finished. Obviously not, nothing is that easy. It was at this point that I realized the insulation was not just the foam mat that had easily come out. Underneath, was a thinner layer of “tar mats”. I couldn’t install the new insulation without first removing the tar mats. Also the tar mats were old and starting to crack so I wanted to remove them. This turned into another huge undertaking.
There are basically two ways to remove old tar mats: extreme heat or extreme cold. Considering the proximity to the batteries and success with my initial attempts at removing the mats using the cold stuff from an air duster, I decided to go with the later approach. People commonly use a dry ice slurry to freeze the insulation off, but I wanted a more concentrated source of cold. I was worried that the widespread freezing of dry ice would freeze the batteries (or get them cold enough that condensation could form inside). Hense, inverted air-duster cans.
 For the sake of keeping this post short, I’ll skip to the beautiful finished install. Looks super space-age.
I replaced the old tar mats with some fancy Dynamat thermal-acuoustic insulation. It was a marked improvement over the old mats.
After spending hours pounding out old tar mat, I started to realize just how big the area where the storage bins had been was. And I started thinking… It would make a lot of sense to put the batteries here, instead of where they are mounted now… Nothing is ever done. More posts to come.