Well, its been a while. I haven't posted for a long time, but in that time a lot has been accomplished (get comfortable this is going to be a long post). First and foremost, we ordered the parts (cue confetti)! Due to the rather large and heavy nature of the items we were shipping we had to order the shipments in two loads. Unfortunately, because some of the parts are made-on-demand there were some unexpected delays with the second shipment. Of course, we should have probably come to the conclusion that this would be the case sooner as many of the parts we are ordering aren't exactly something you can find on Amazon (and thats saying something). Anyhow, the good news was we were notified as soon as we received the first shipment that the second one would be delayed. So in the mean time we were able to get some work done. Here is what was accomplished (more or less in this order):
Gas Tank And Exhaust Removal
Soon after we had removed the engine we began what seemed to be the next logical step: purging the car of its remaining petrol componentry. Removing the exhaust on a car with some miles on it is a pretty large challenge as I'm sure many mechanics will attest to. This is mainly due to the fact that the entire exhaust system (including bolts), likes to corrode under the immense heat and frequent road water. This means most of the bolts are not much more than rounded of nubs with nothing for a ratchet to grab onto and as you can imagine, that becomes a problem. After a few snapped bolt heads and bruised knuckles, we decided to take a more delicate approach... RECIPROCATING SAW (a.k.a "The Butter Knife")!!! Luckily for us, the car won't be needing its exhaust system once we are finished with it. We were able to make a single, cut and maneuver the entire thing out. On a side note, the different types of reciprocating saw blades (logically) work best on whatever kind of material they are labeled for. We figured, "Ahhhh, a blades a blade. How big of a difference can their be between a wood and metal blade anyway?" Turns out we couldn't have been more wrong. We spent about an hour and a half attempting to cut through the pipe with a wood blade (we even resorted to a Dremel for a little while). Finally we caved and bought a nice metal blade and thus, The Butter Knife was born. It only took us about 30 seconds to finish the cut with the new blade. Just goes to show, you've got to have the right tool for the job.
After the exhaust was out, we moved onto the gas tank. This was a little more of an operation. We had to unbolt and remove all of the bolts holding in the fuel lines that used to run to the engine and then carefully pull out the fuel lines while trying not to spill the remaining gas that was in them all over the garage (and in our faces). Let's just say our garage still has the faint aroma of gas. Once the fuel lines were out, it was time to remove the gas tank. It turns out that the gas tank is literally held in with nothing more than two metal straps cradling it to the frame of the car. We literally just had to remove four bolts and the whole thing dropped out... Mostly. Turns out some fuel lines run through the chassis of the car. We didn't know that and had to disconnect them, which resulted in more gas in the garage (and all over our faces, again). So much for a clean removal, but hey! It's out.
The gas tank came out with only a little bit cajoling. This is a quick edit of the process.
Flywheel Liberation
Removing the flywheel was not difficult at all. It was really just an excuse to get to play with large power tools. As I mentioned in the last post, the engine uses a massive 54mm nut to connect to the flywheel. Needless to say, our ratchet set would not suffice. So it was of to Harbor Freight Tools (we seem to be visiting here a lot lately) to buy the biggest electric impact wrench they had. It would fit up to a 46mm bolt. So then it was of to the internet to order an adapter to fit larger socket types. Then it was of to Lowes to buy a massive 52mm impact socket!
 Me holding the combination of socket and driver that can only be described as “epic”.
Once home, it was a simple matter of firing the thing up and letting it works its magic on the bolt for a few seconds. We had to give the flywheel a couple taps with a mallet to get it off, but we have been informed (by the internet) that this is normal.
Flywheels are heavier than they look. Don’t put your hand under one.
And yes, I somehow managed to injure myself during the process.
Cleaning and Refurbishing
As I have stated before, the car is in amazing condition. However it goes without saying that a car this old will need a little maintenance here and there. And as we go through the project more tasks seem to add themselves to that list. Luckily, I had a lot of time while waiting on the backorder where I desperately wanted to work on the car and thus was able to finish a lot of these smaller tasks. The first and most exciting was the windshield wipers, a necessity as we live in the Pacific Northwest.
This turned out to be a relatively easy task that took only about five or so hours, not including the time for ordering parts. I had some time after school one day and decided to have a go at it. I managed to get all of the parts out and after a couple seconds of fiddling with the mechanism I realized the motor was fine and that the arm that linked the wipers together had seized with rust.
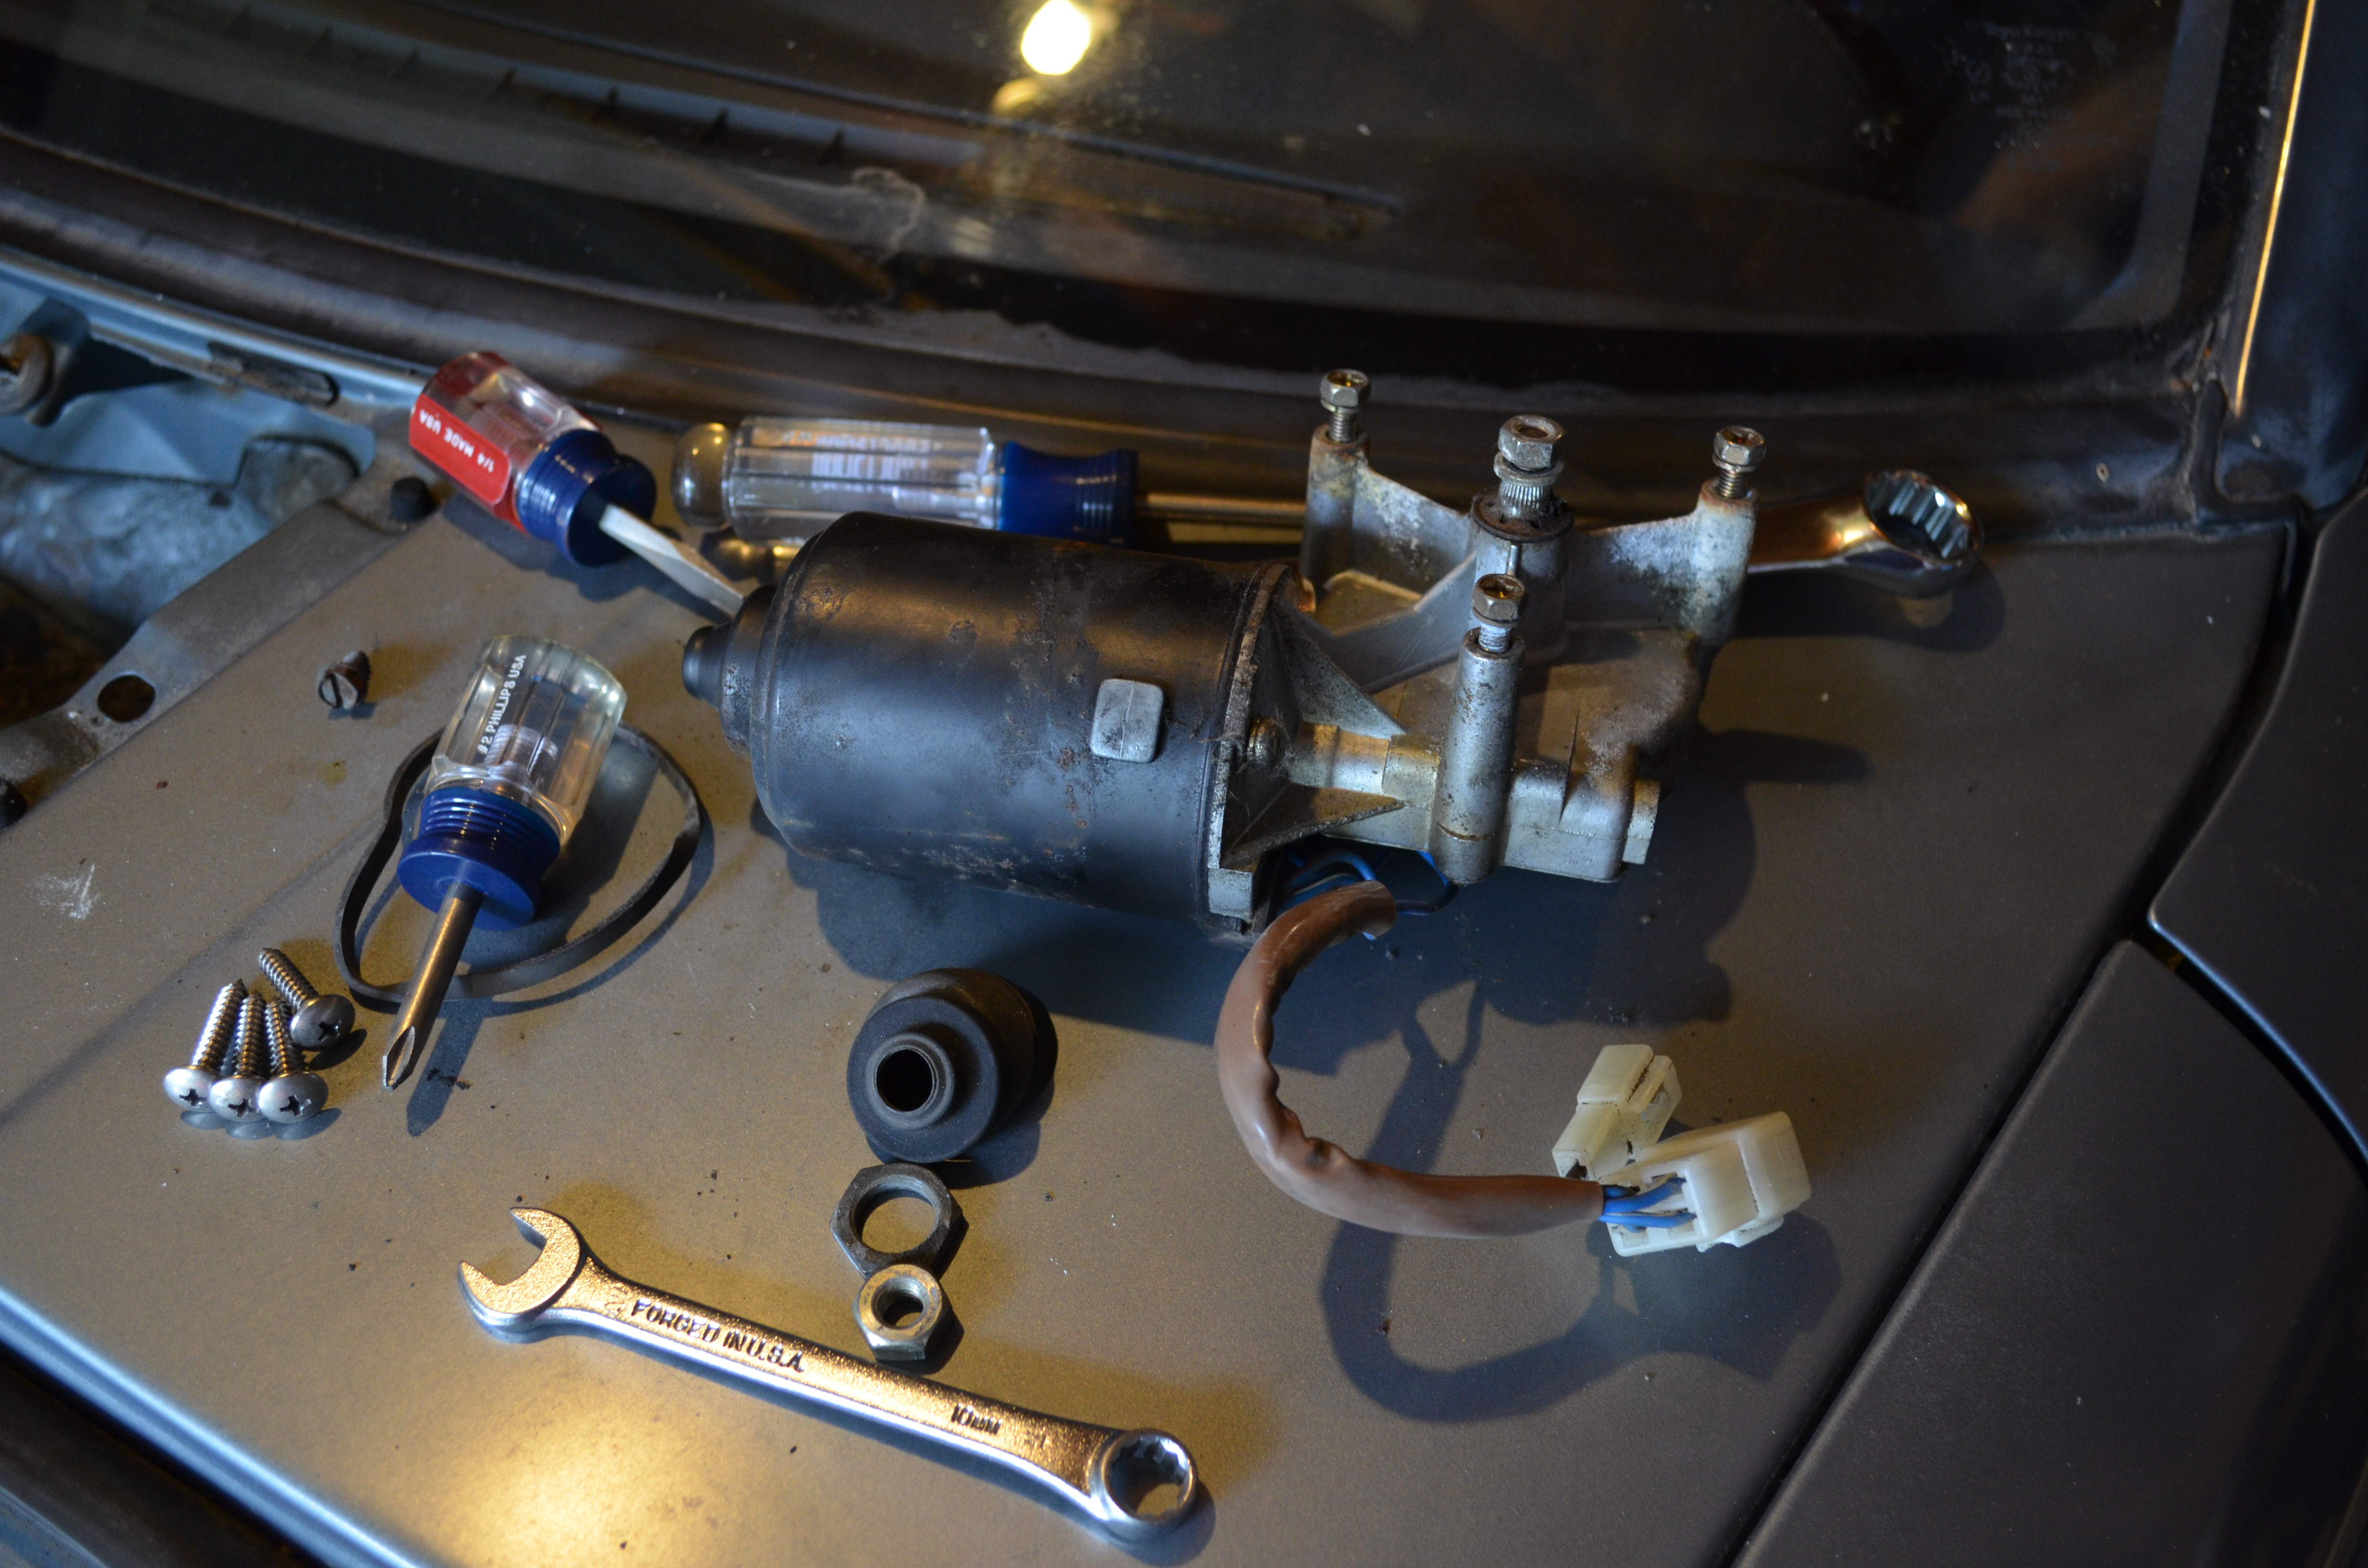 The windshield wiper motor was still in great condition.
This was awesome because as you can imagine a couple pieces of bolted together metal is a whole lot easier to find (and cheaper to buy) than a motor. After bolting on the new arm (backwards at first resulting in the windshield wipers cleaning the hood area of the car instead of the windshield) it worked like new.
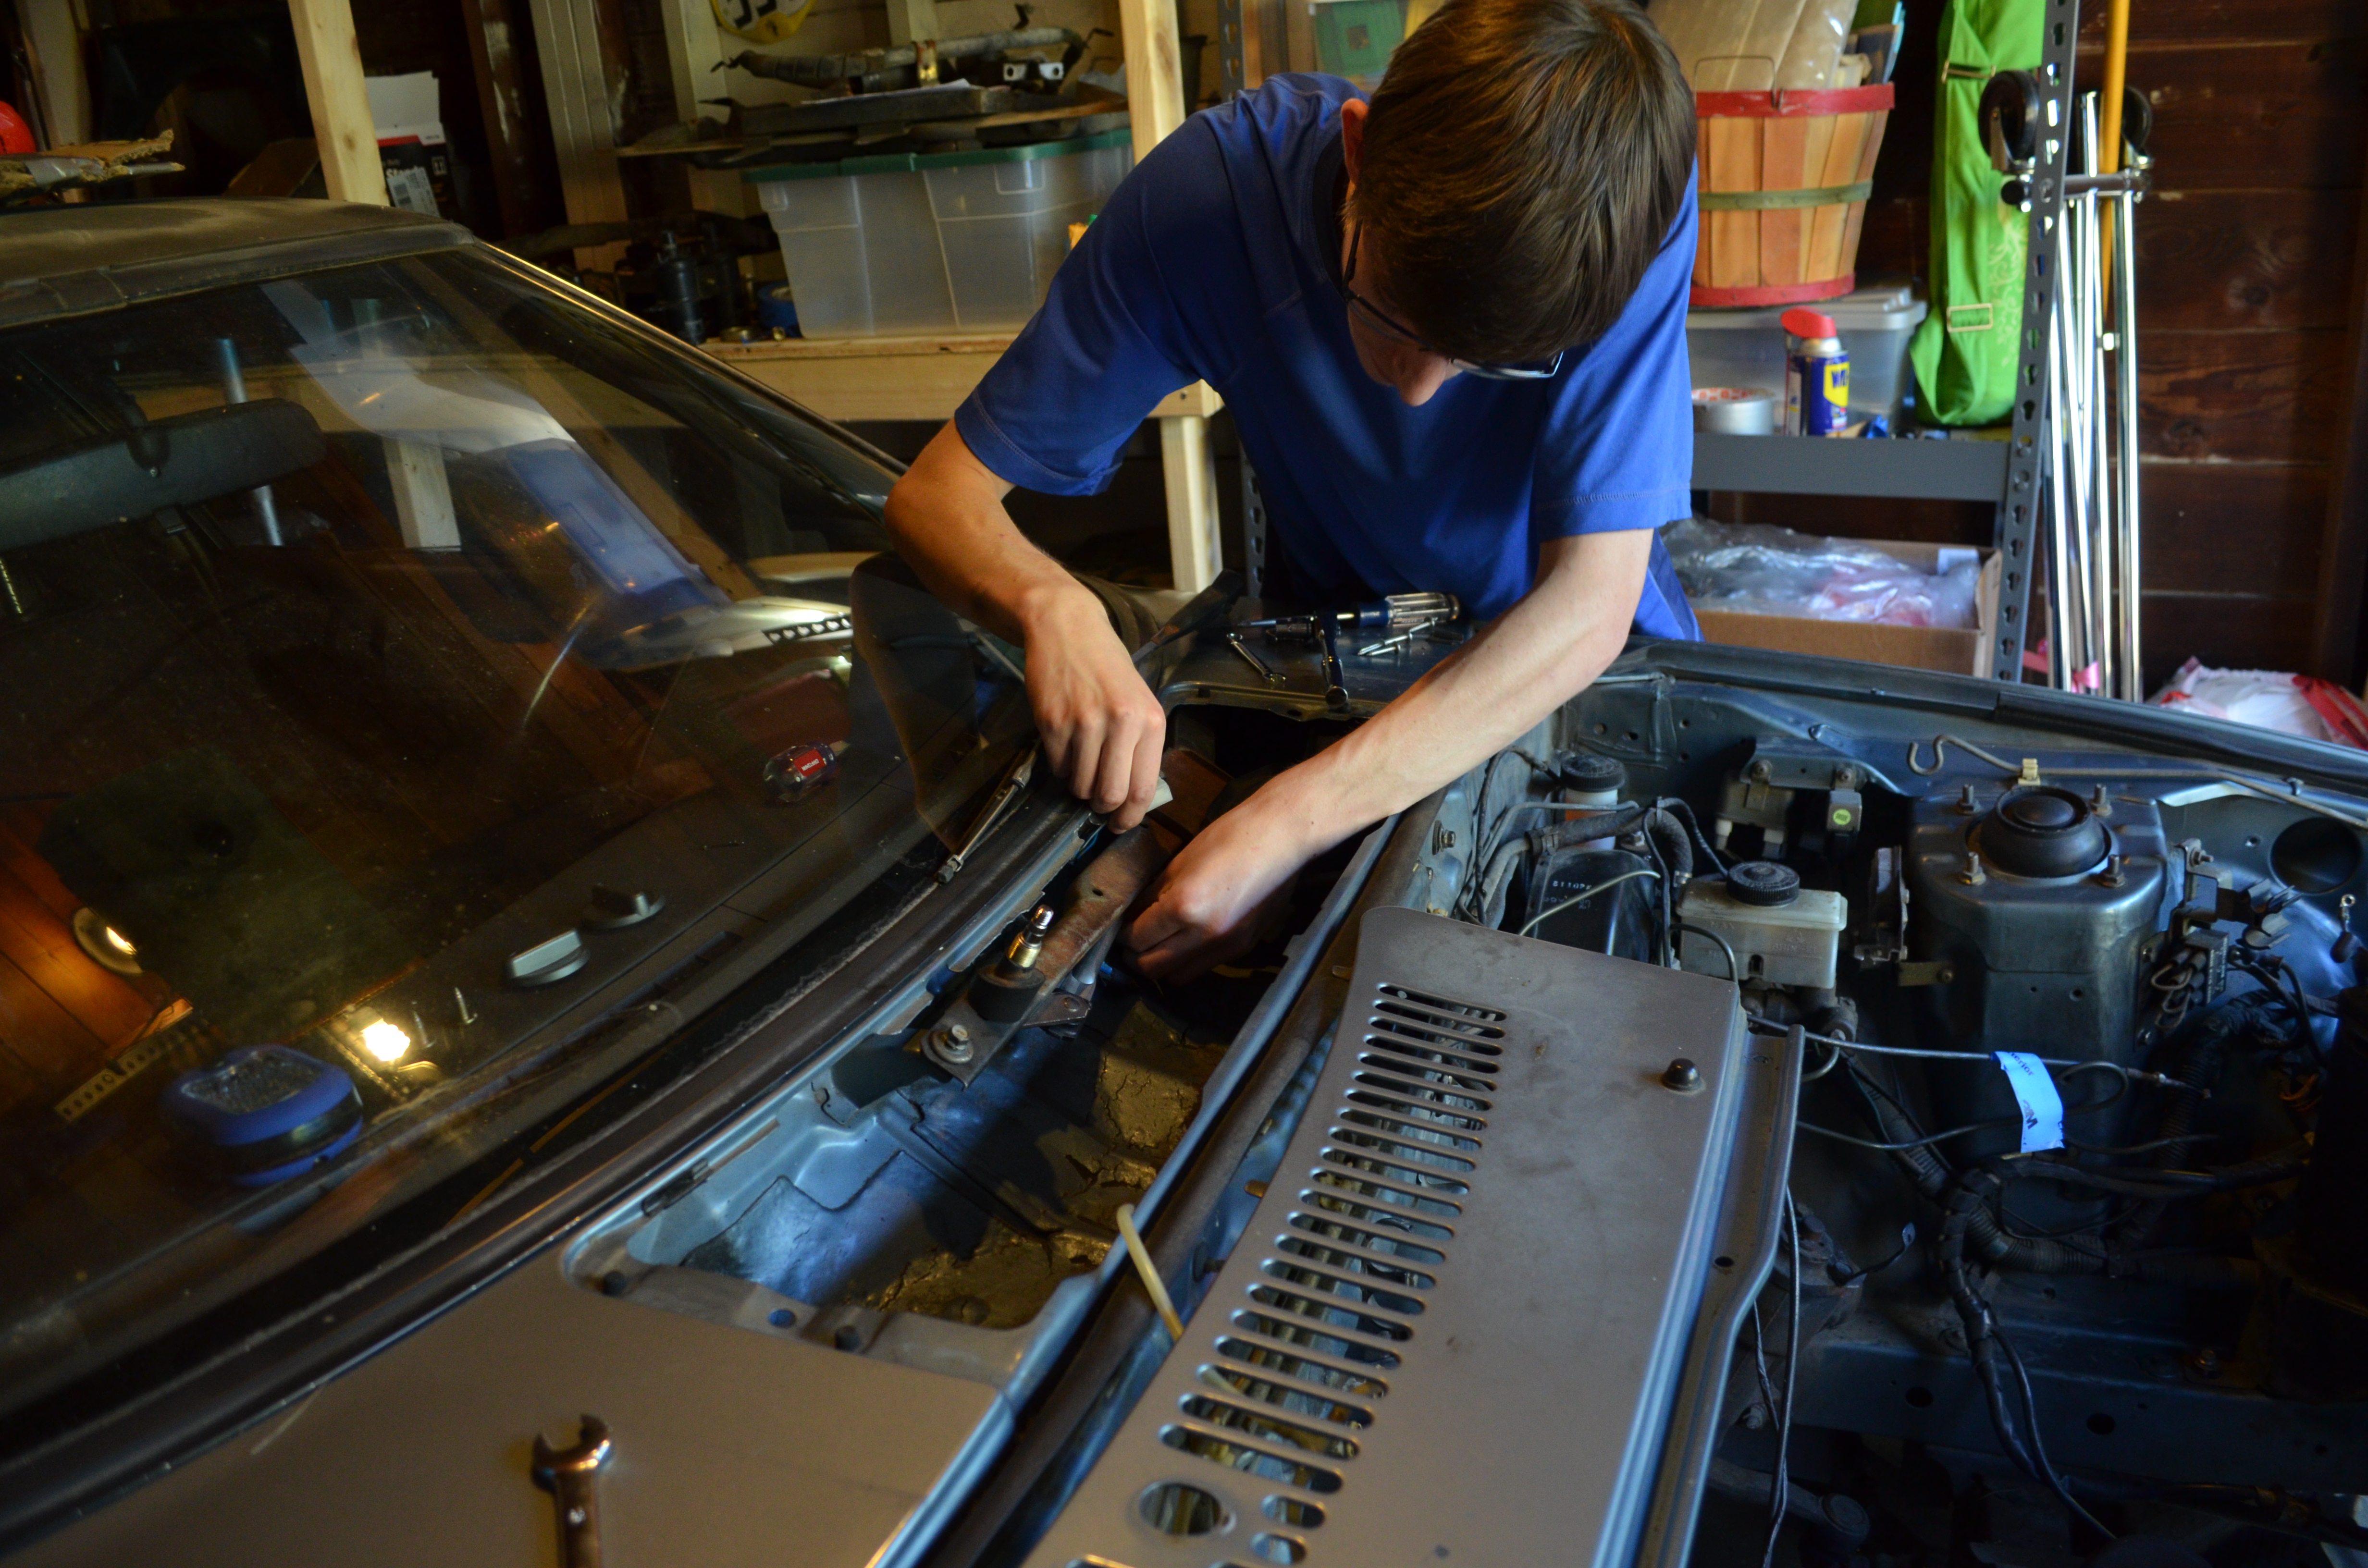 Installing the repaired assembly back into the car.
Wipers are working!
On the topic of weather proofing, we also ordered some new seals for around the windows. The old ones were in pretty bad shape.
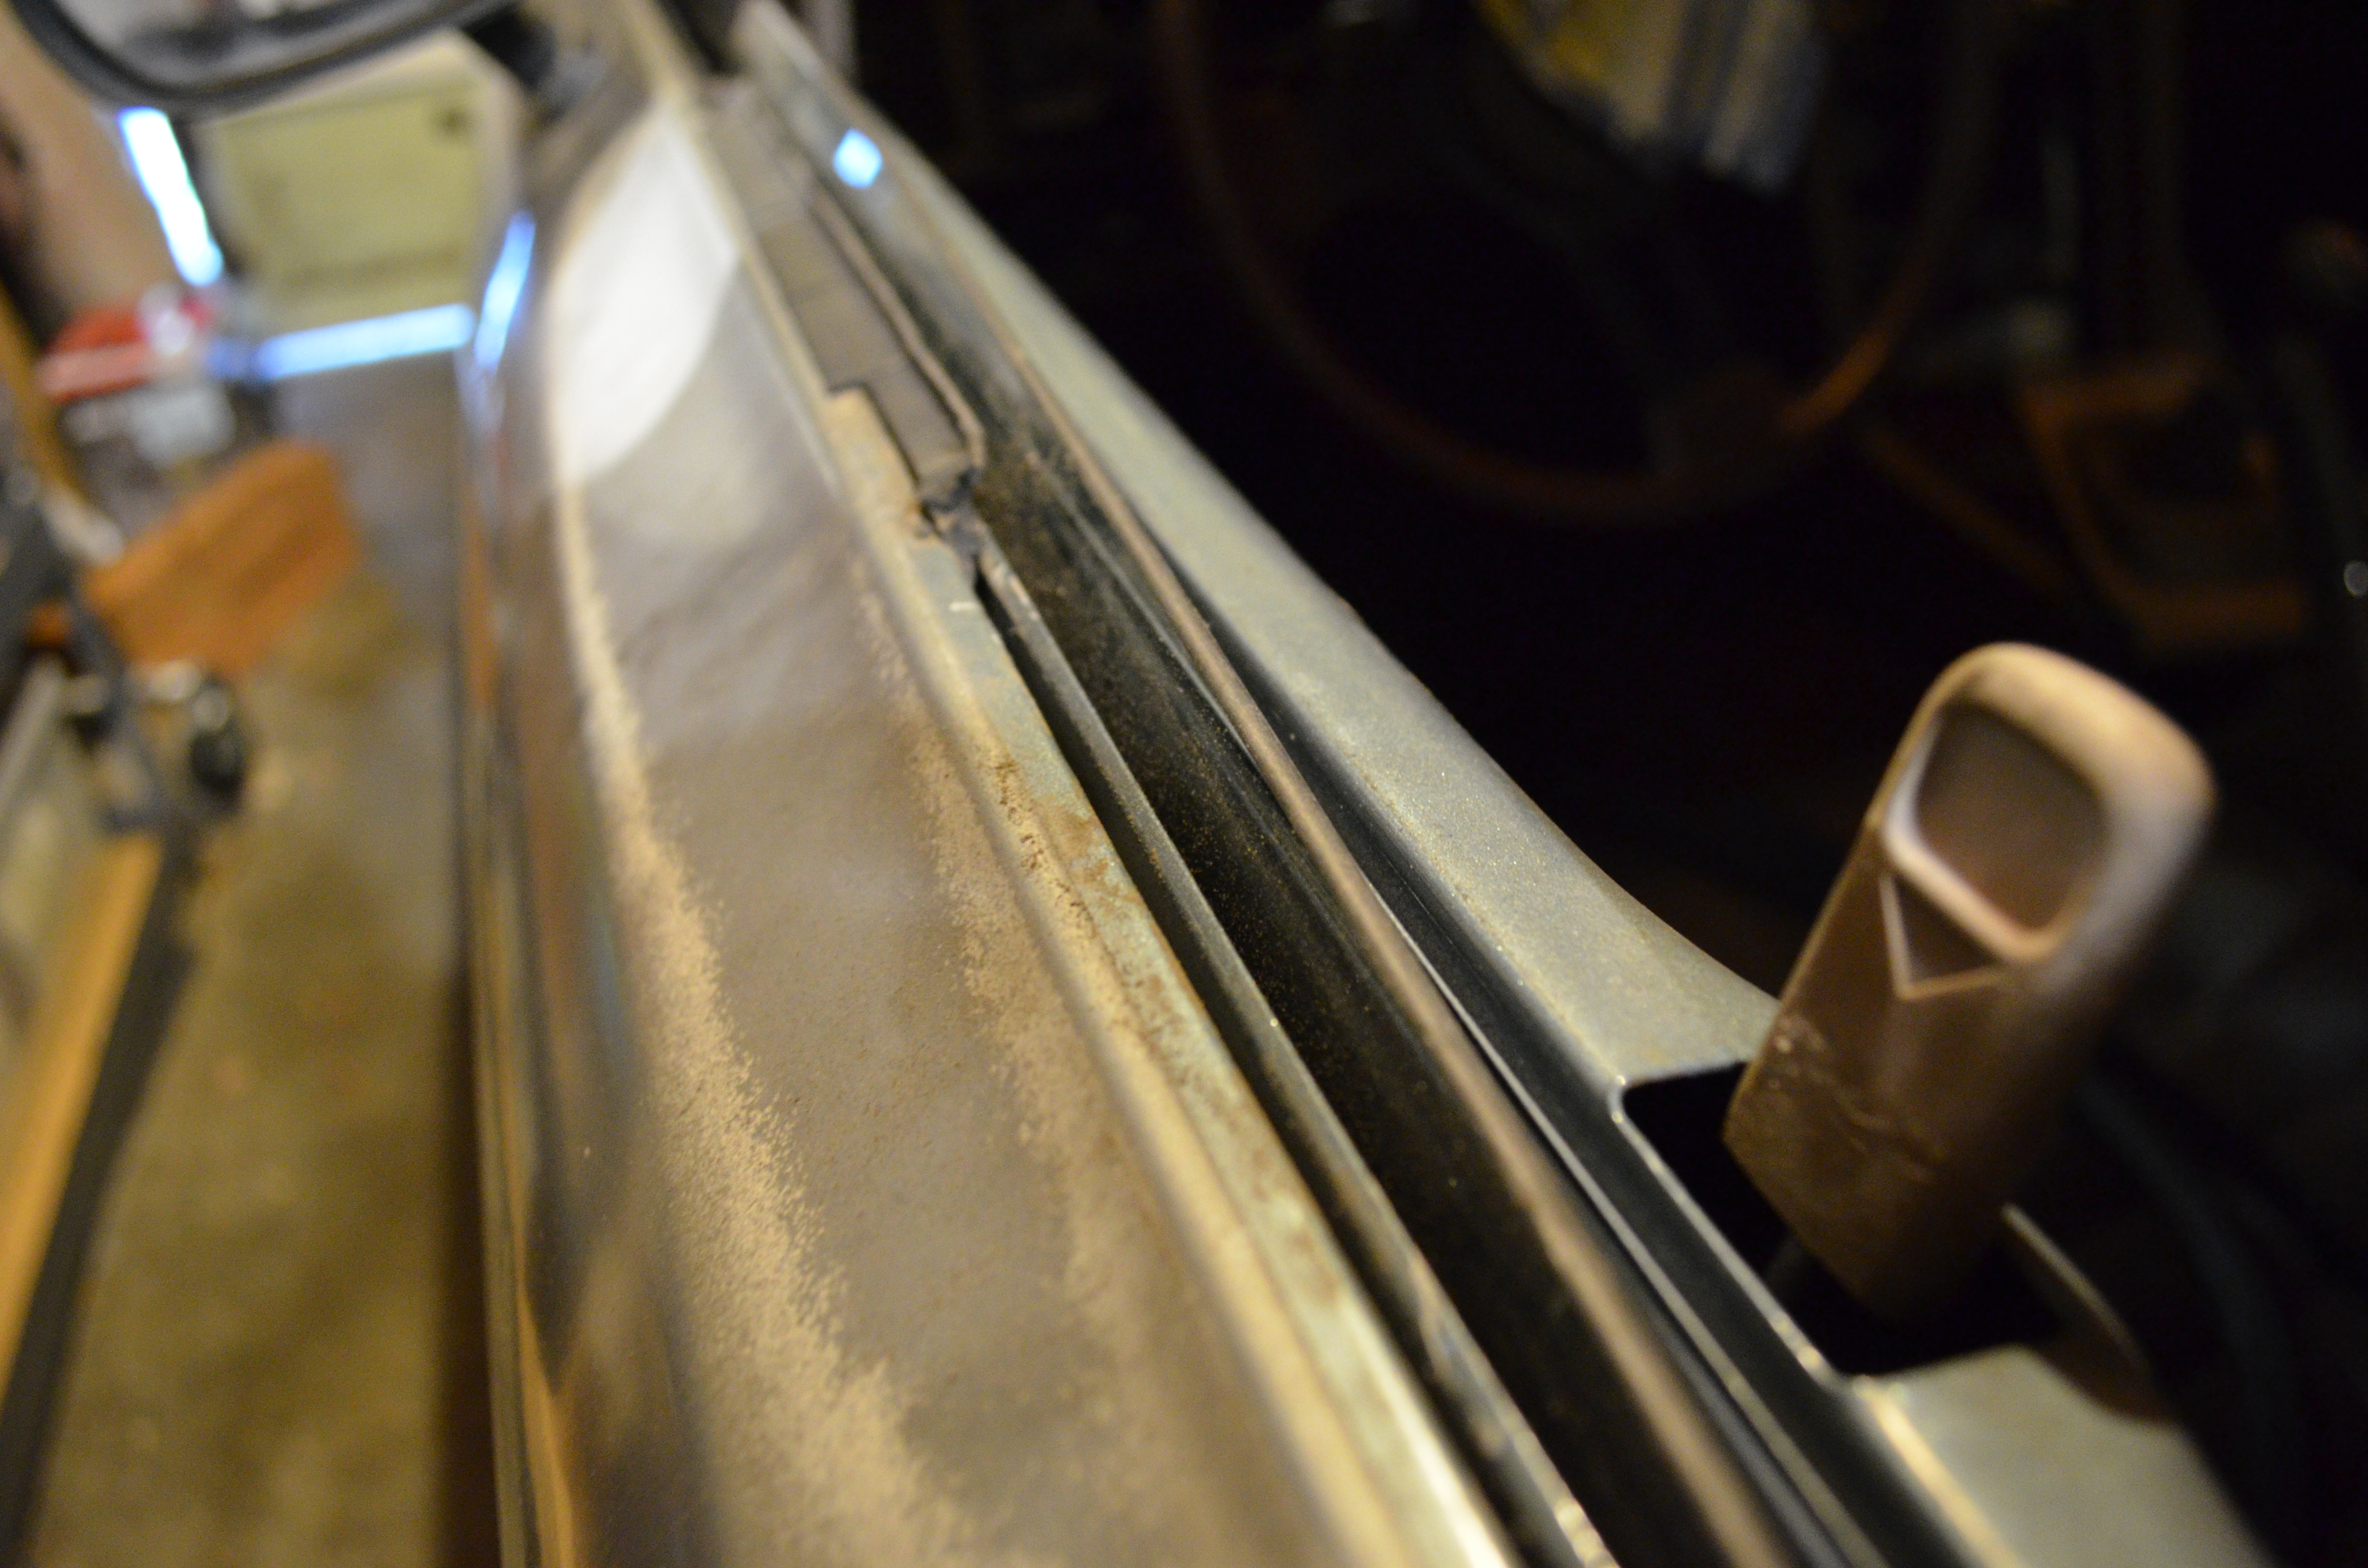 The old weatherstripping literally crumbled as I was taking it out.
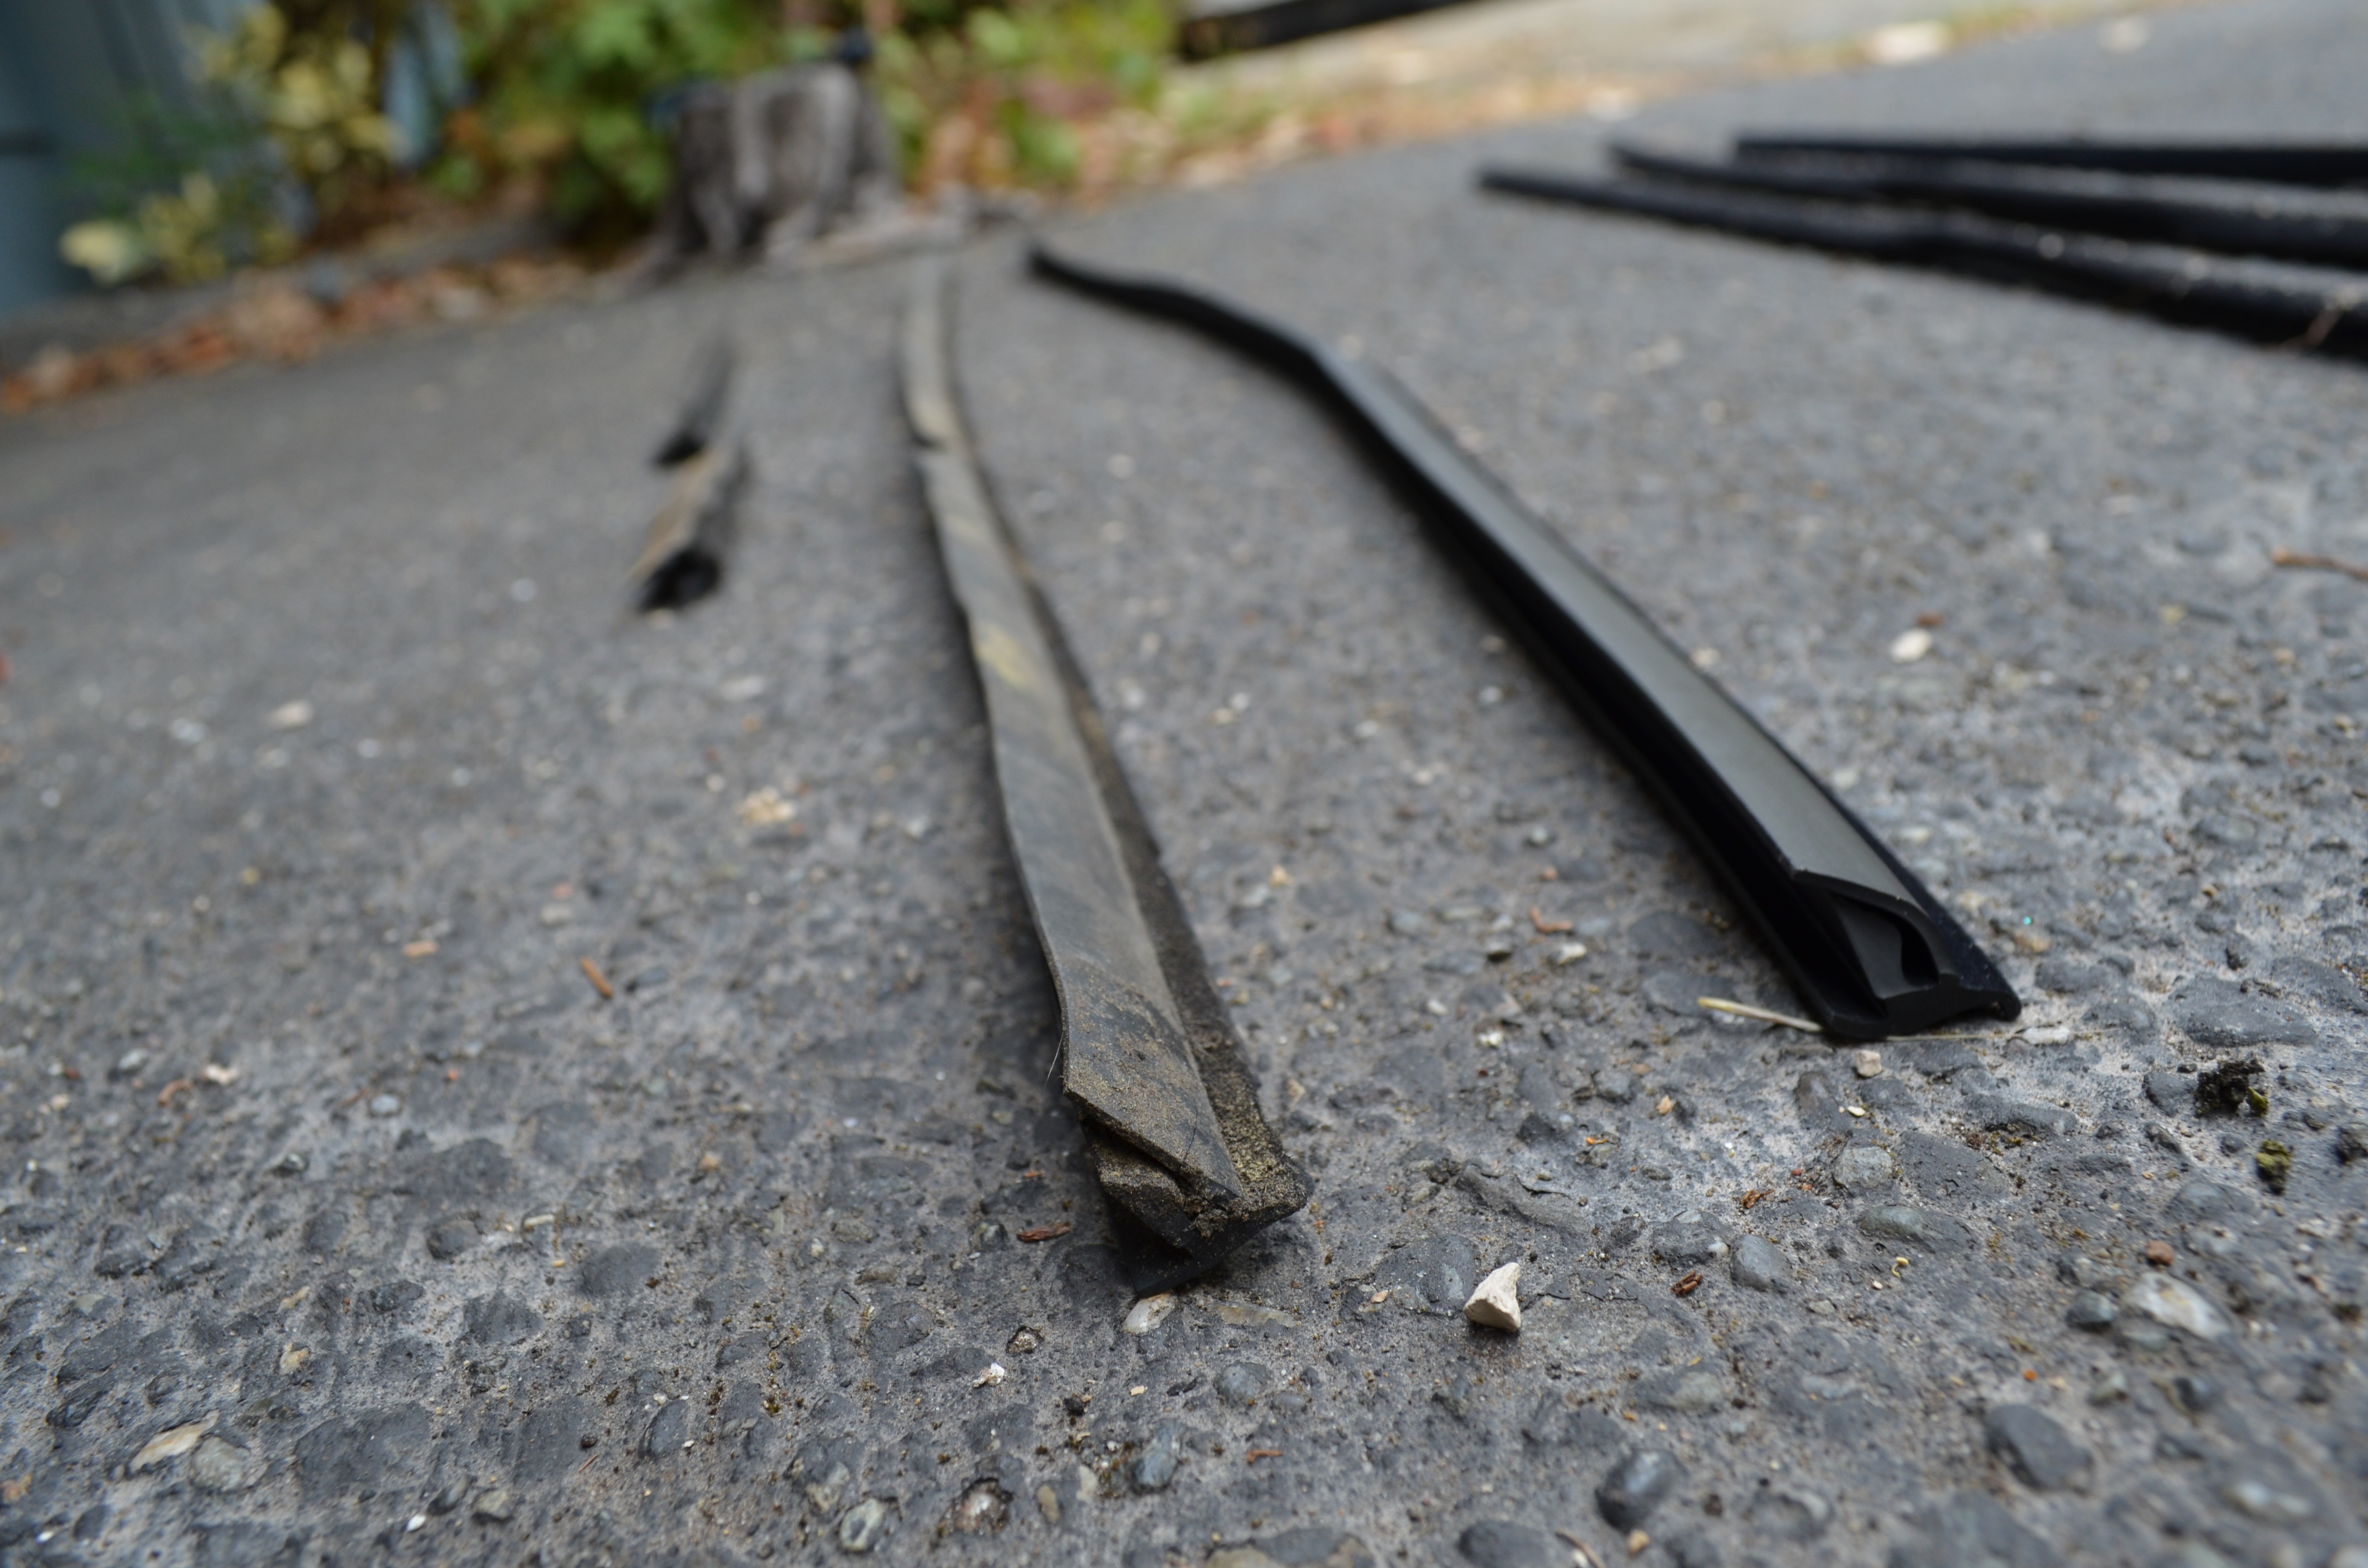 A piece of old weather stripping on the left compared to the shiny new one on the right!
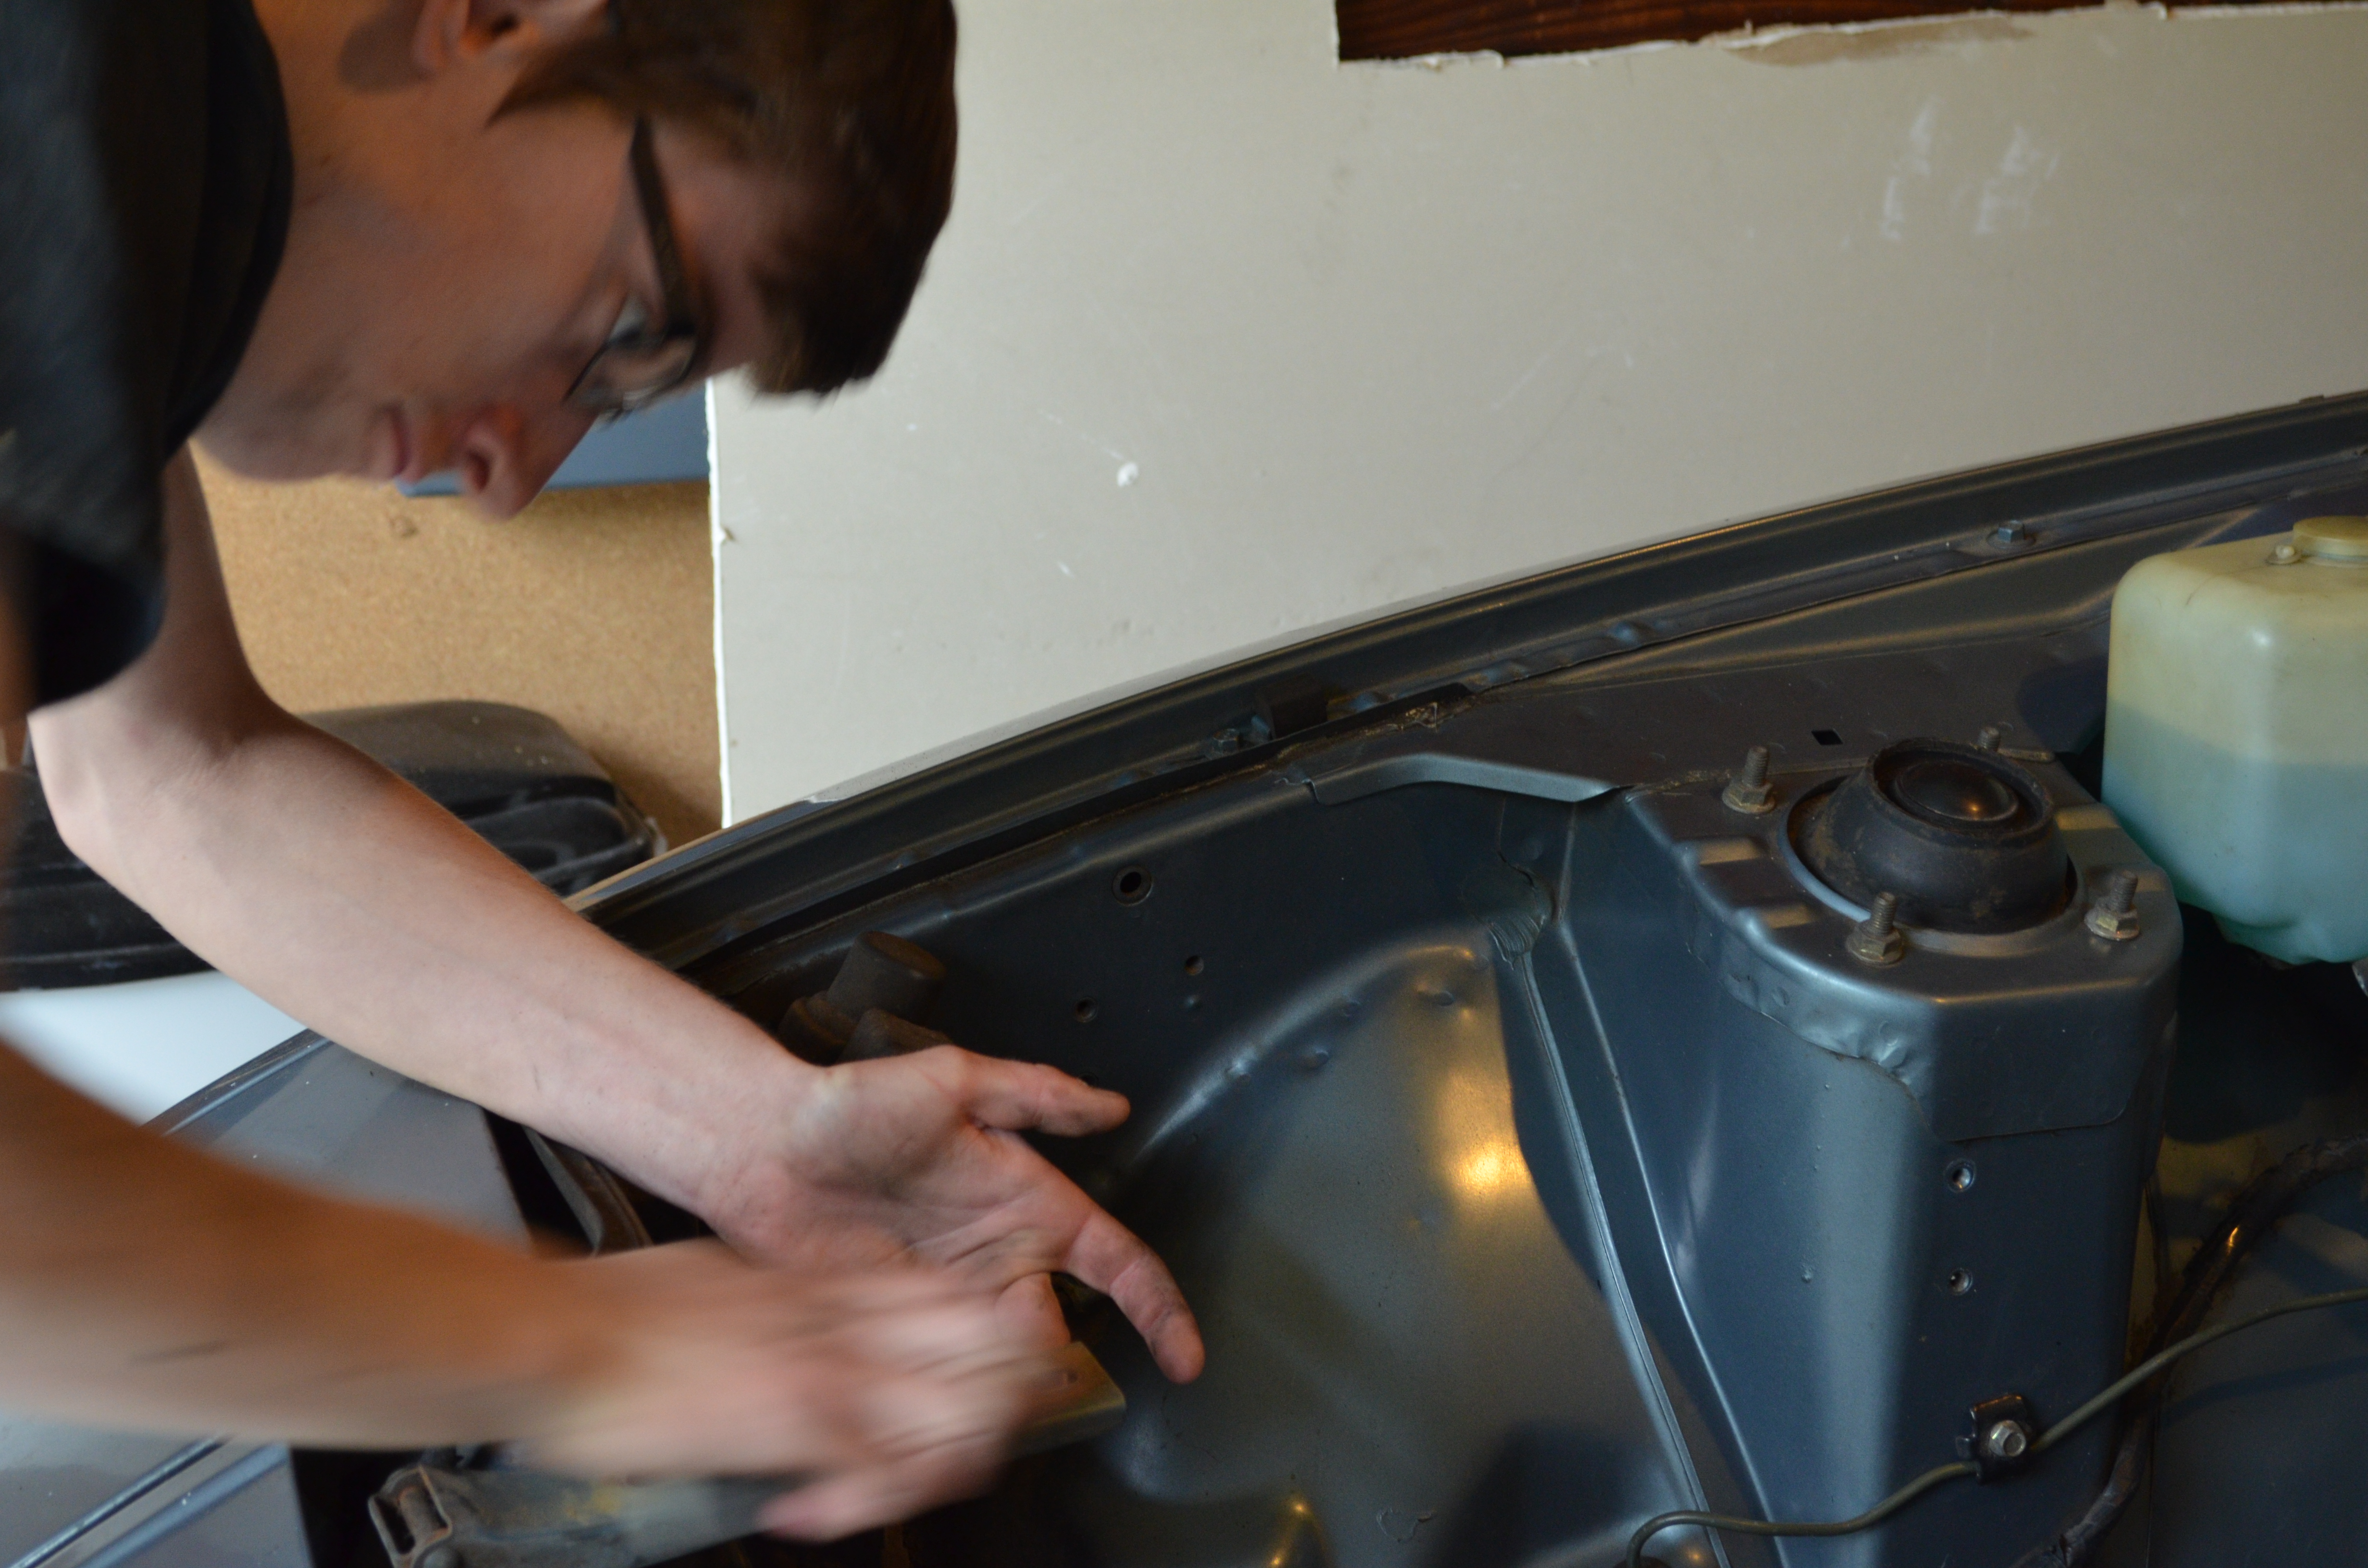
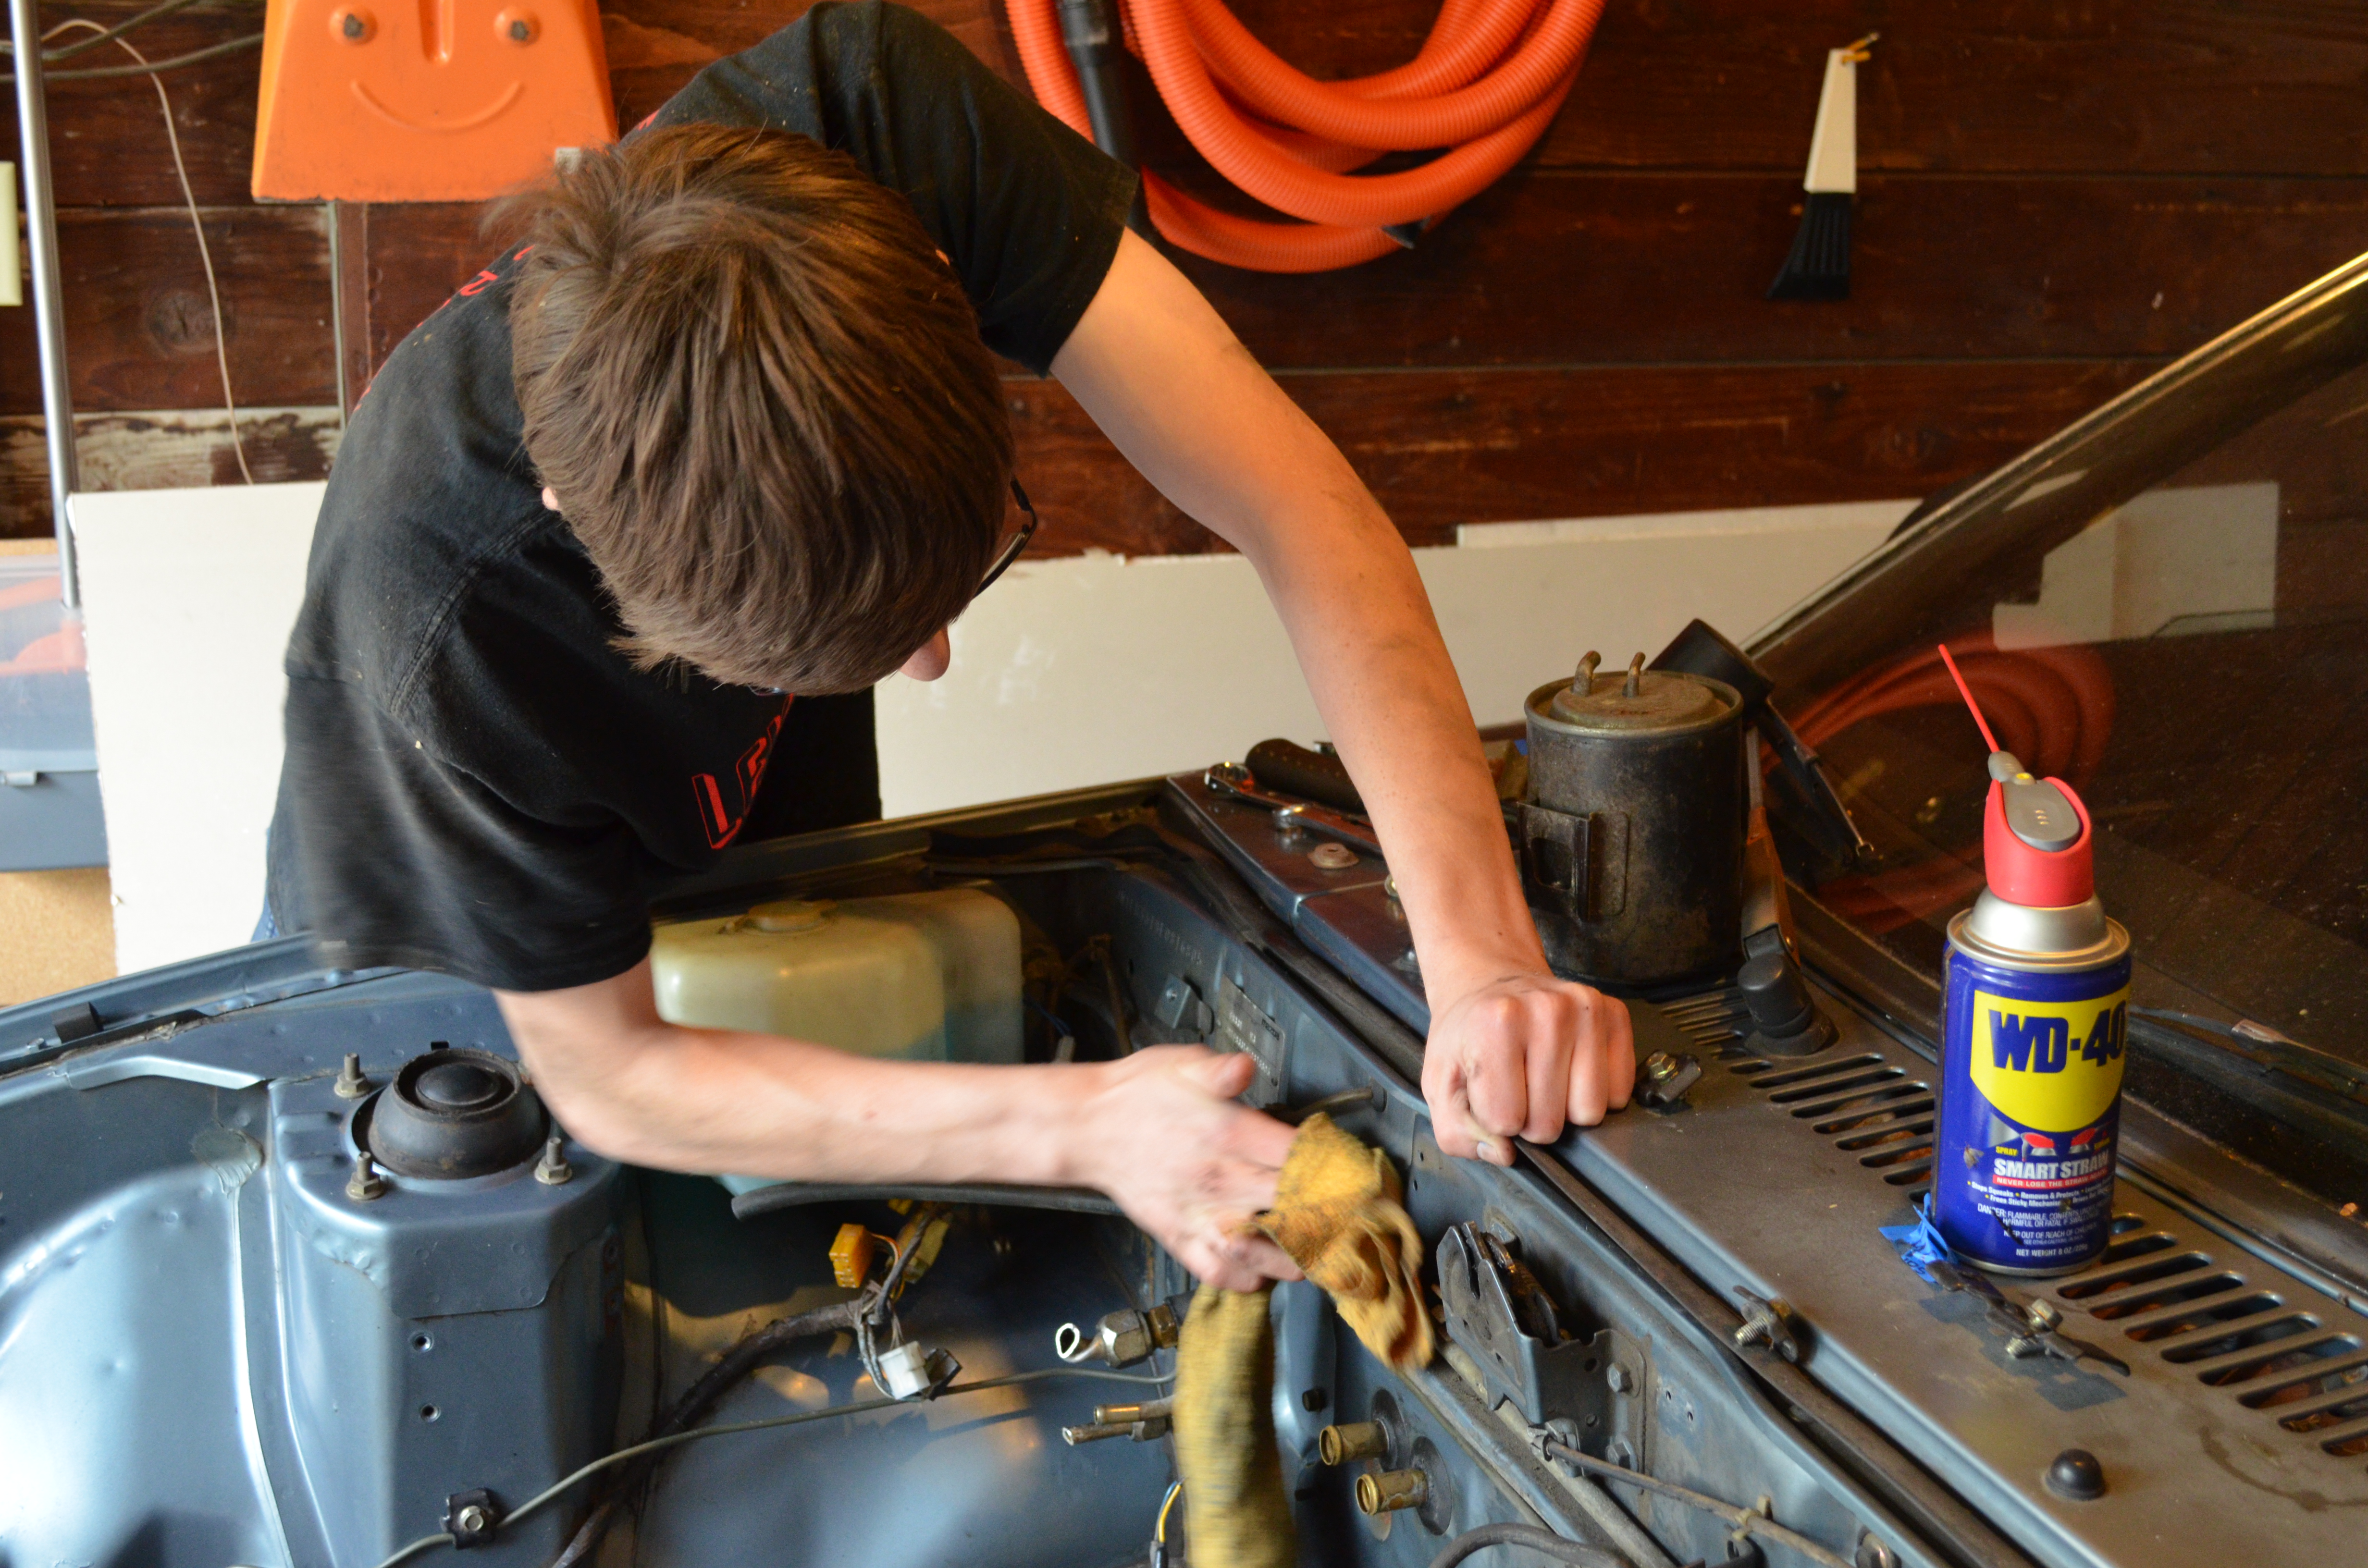
Finally with all the important stuff out of the way I started to work on some minor aesthetic problems. We plan to get the car resprayed when we're done, but right now there are other smaller things to get touched up. First I wanted to detail the car. Obviously I'm not a professional but with the help of a lot of YouTube videos and an abundance of forum posts on the internet, I was able to get the general idea. The main sources of dirt were in the engine compartment and the bell housing of the transmission. I cleaned both of these thoroughly and after some work they looked much better. Had we been installing another petrol engine I don't think I would have gone to all the trouble as it would have ended up dirty again anyways. But with the new electric motor there will be no oil or carbon buildup to be had! So it should stay pristine barring the occasional splash coming in from underneath the car.
 Sanding of some rust that had accumulated on the hood hinges.
 Wiping down the front of the engine bay.
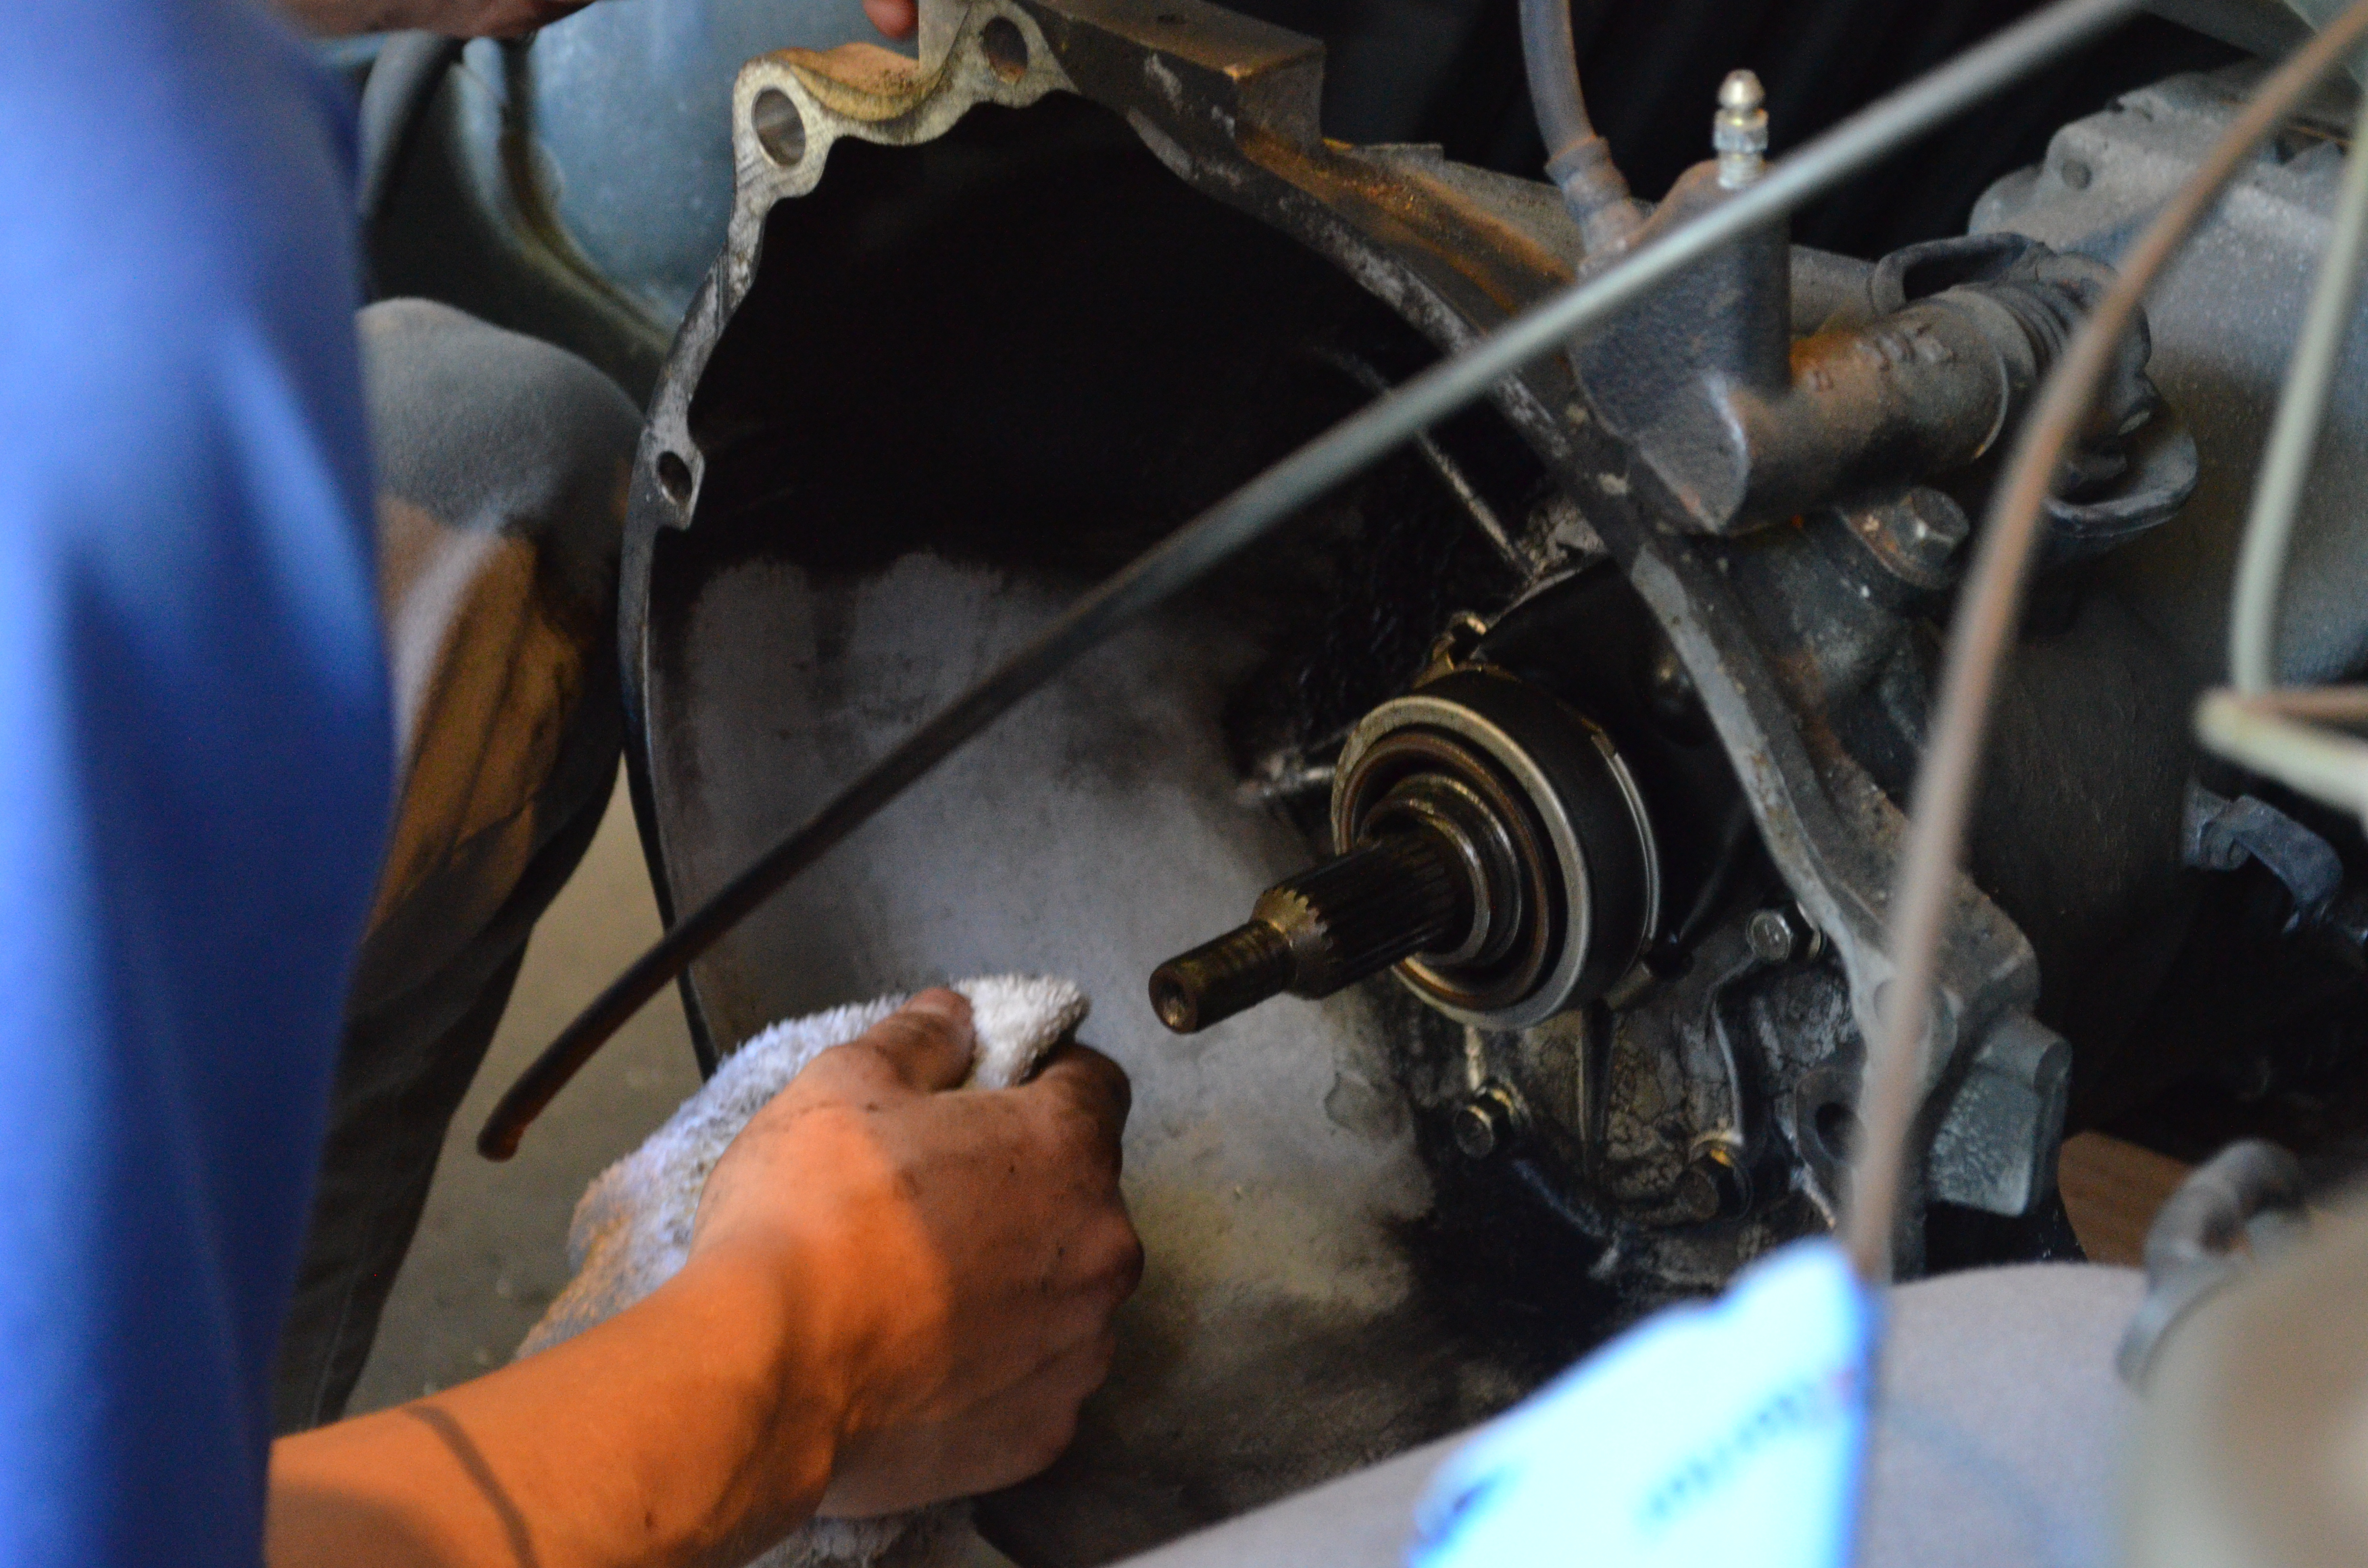 Battling the unstoppable forces of filth, grime, and oil residue that had made their home in the transmission bell housing.
After all that I decided to look to the inside of the car. Most of it being leather, it was a little bit trickier to clean. One of the seats of the car is in perfect condition, however the other has some cracking in it. We will be getting that one reupholstered, I think. But the other one is in impeccable condition and so I just cleaned it up a little bit. Leather is hard to clean and you have to be careful not dry it out or ruin it in some other way. I did extensive research on the subject beforehand (and tested it on the cracked seat first) and it came out well. I also did the steering wheel as it was also made of leather. Then it was on to the carpet which was easy, the rest of the dash, and other plastic bits which basically just needed to be dusted.
Stereo Rewiring
So one of the things I have always wanted in a car is an in-car entertainment system that doesn't suck. Surprisingly the only car that I really feel meets this criteria is the Tesla Model S. I may not be able to afford one of those, but I certainly can try to make something similar. As of the moment I am writing this, the stereo rewiring is all finished and I'm just working on getting the Nexus 7 fitted so that it looks like it came stock. That's the ultimate goal here, and not just for this bit of the project. We want this car to be a 1984 Mazda Rx7 GSL. Almost, anyway... I think I might call it the 1984 Mazda Rx7 GSL-EV as it kind of rhymes with the mass produced GSL-SE model. But this is wildly off topic. The stereo rewiring was a pretty big project getting the whole thing operational and since it isn't totally finished I think I'll save it for another post. Just thought it was worth mentioning as it was what occupied the majority of my time while the parts were on backorder.
Parts, Parts, and More Parts!
Somewhere in this process the parts started to come in. They came in two orders, the first much sooner than the second. Unsurprisingly, they came in big trucks on big pallets, and both delivery people asked something along the lines of, "Is thing the right place?" I don't think our house is the kind of place they are accustomed to delivering too.
The components have finally arrived!
Anyhow, the first shipment came in with just the motor, controller, chill plate, and controller mount. There wasn't a whole lot we could do with the motor without some other parts but it was fun to look at. As for the controller and chill plate, those I could work with! The chill plate needed to be mounted to the controller with black silicone and then bolted in place. Seemed easy enough, and it was (for the most part).
 The shipment and its abundance of parts rest in front of their future home.
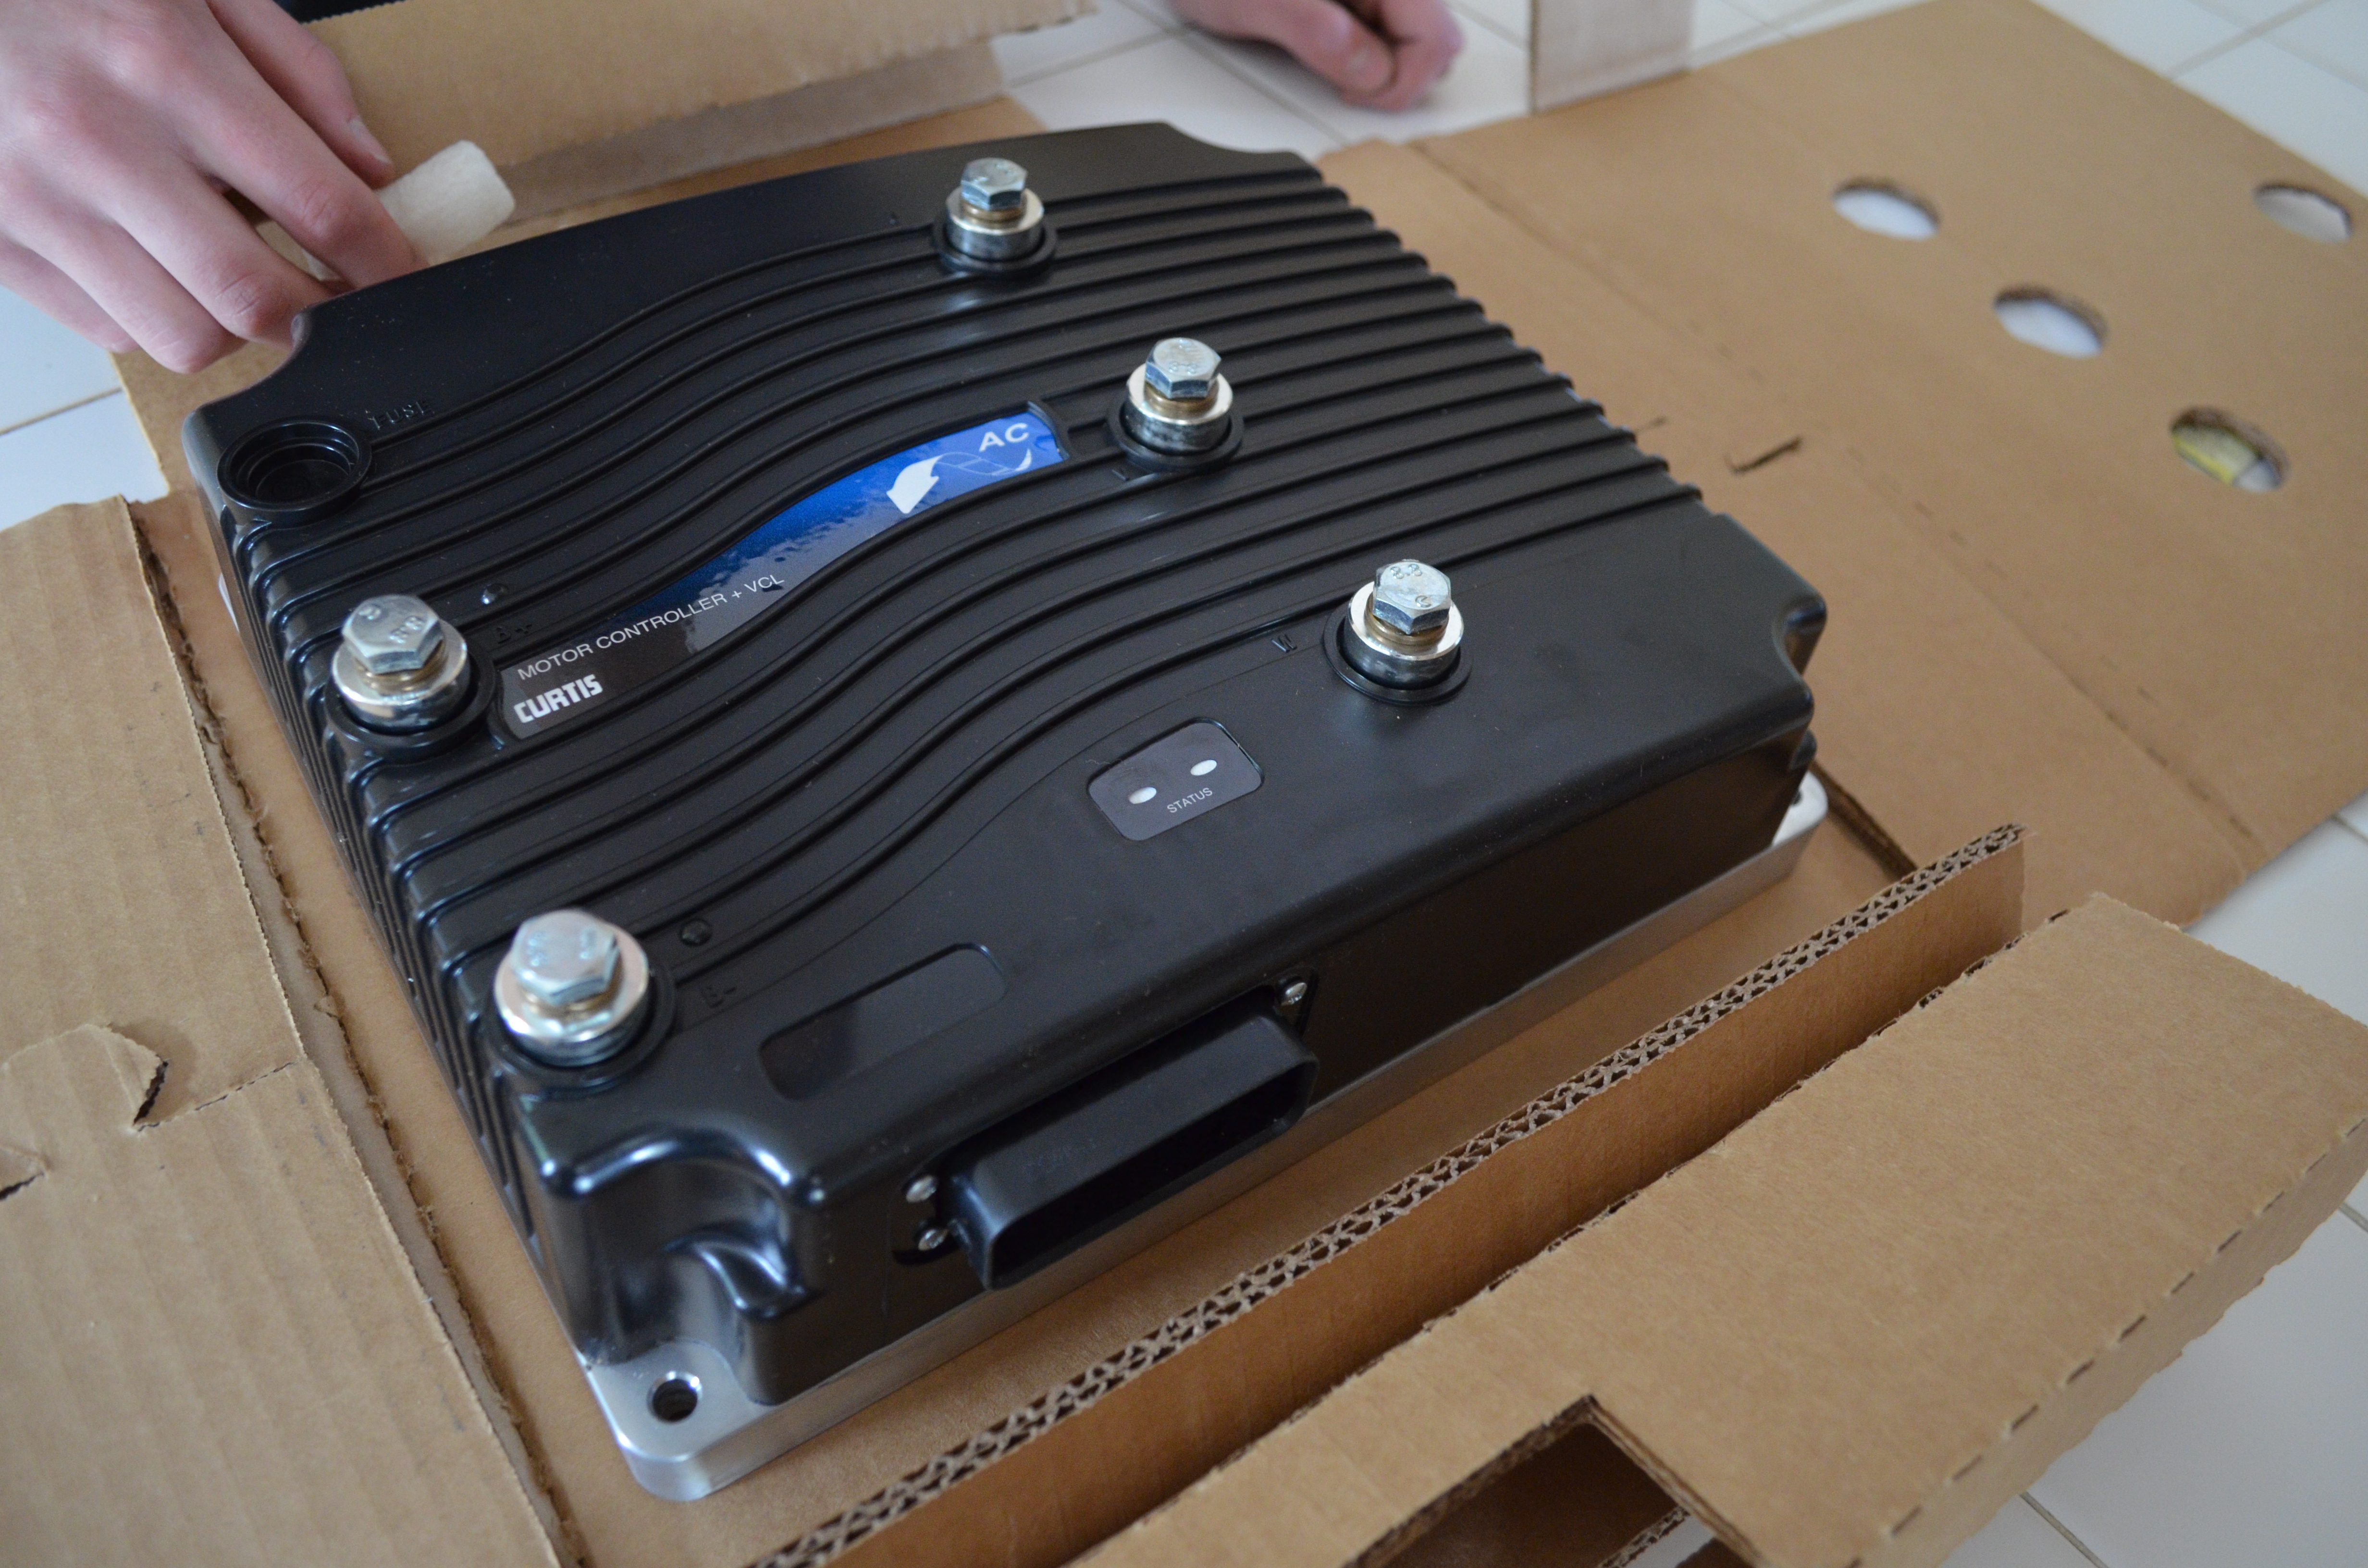 The motor controller awaiting chill plate installation.
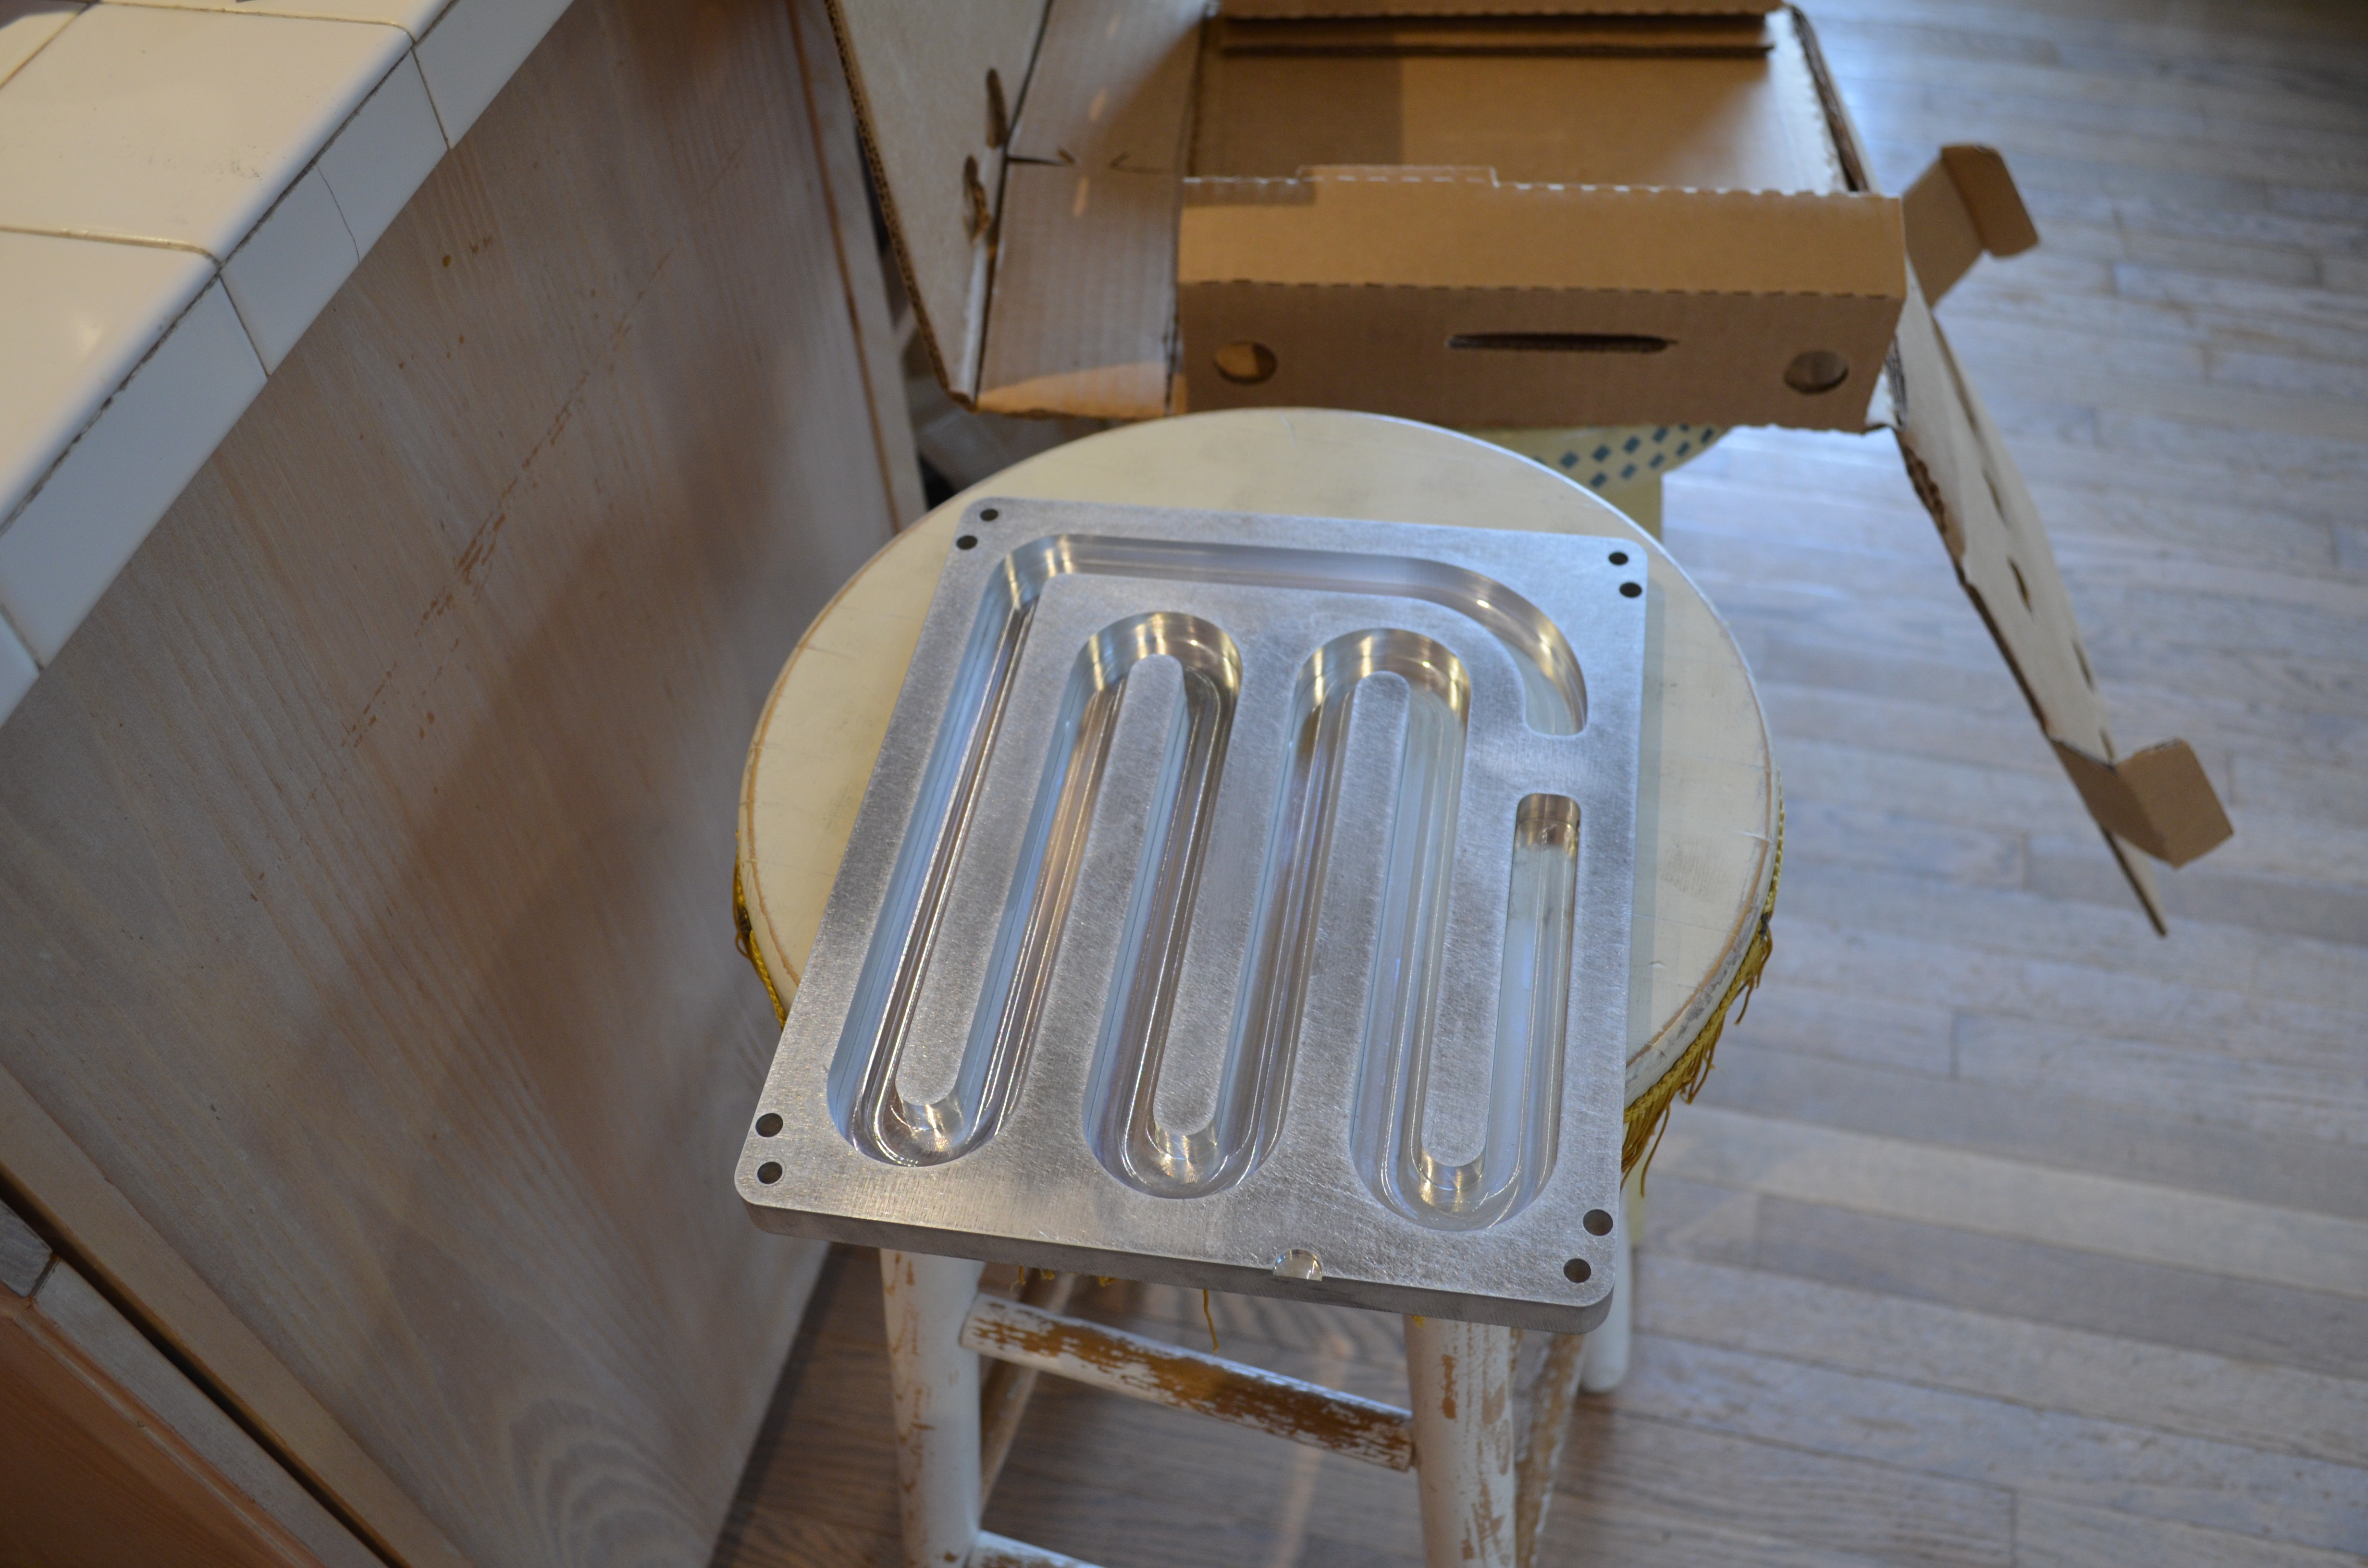 The billet aluminum chill plate sanded and cleaned to perfection.
Basically, I just sanded down the imperfections on the controller and the chill plate and took off any smaller stuff with solvent and a paper towel. This left an oily coating which I cleaned of with isopropyl alcohol. Then I went about applying the black silicone around the edges of the controller.
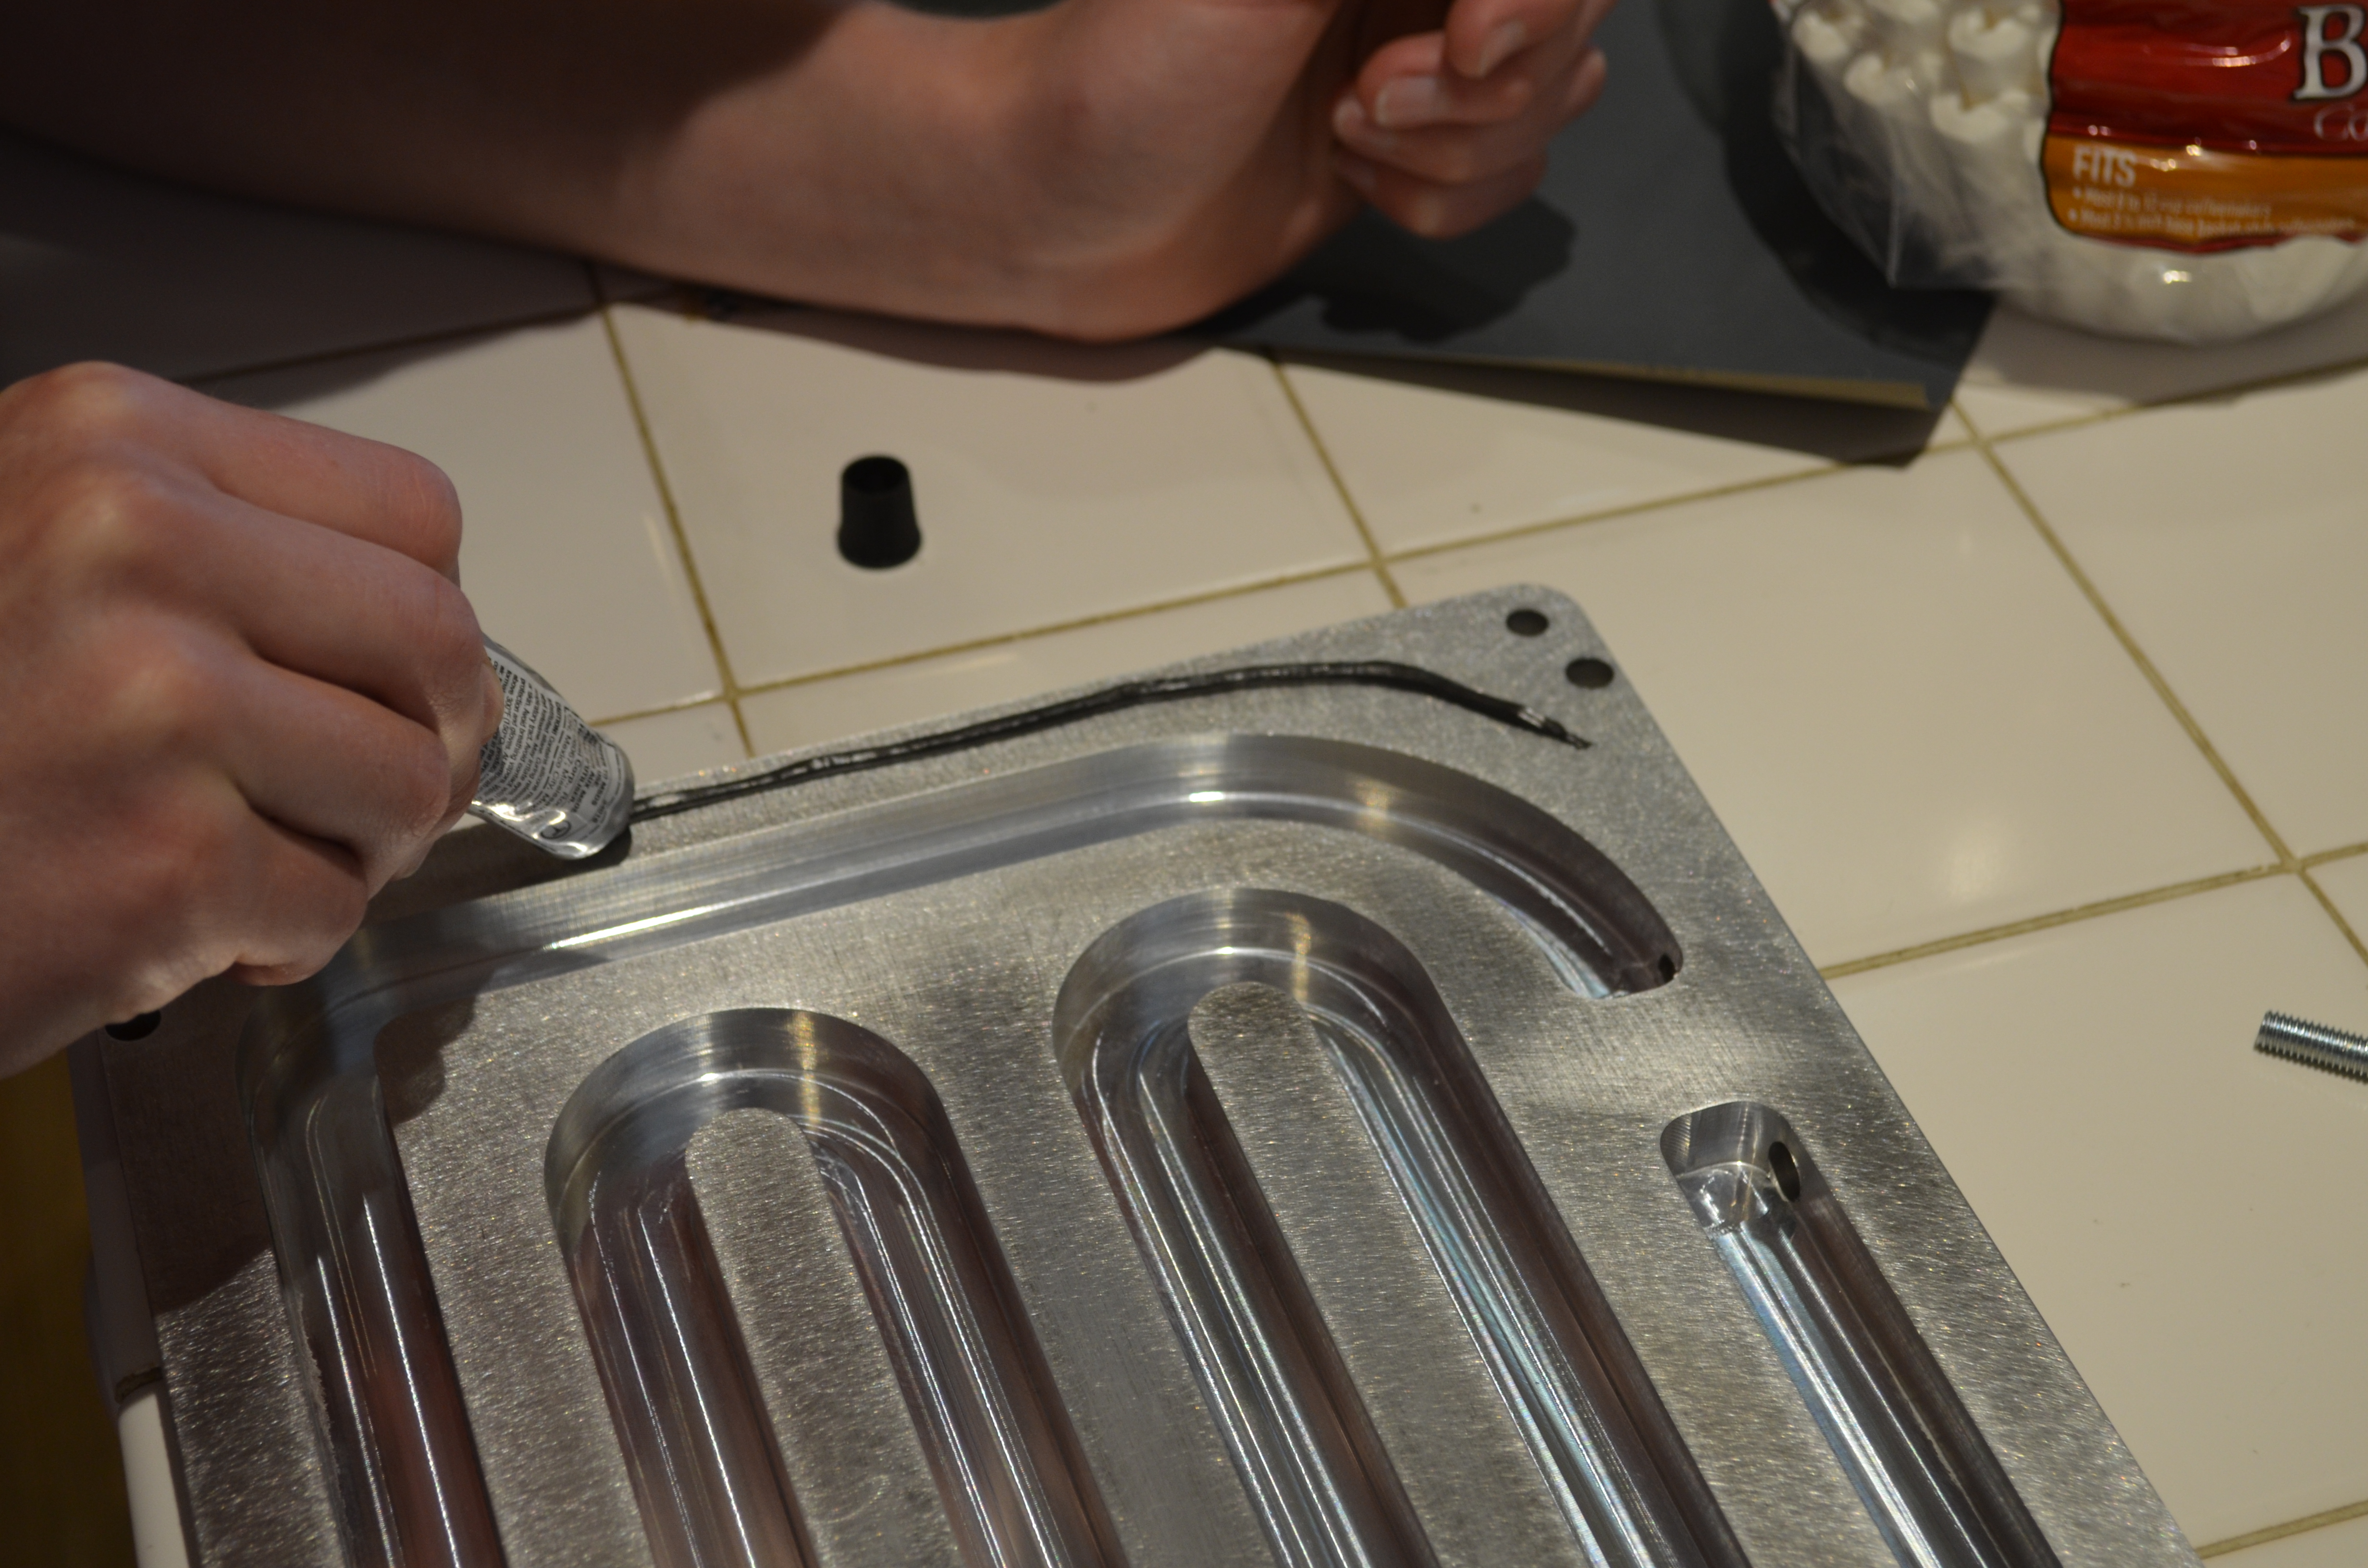 Applying the silicone… For the first time.
It was some pretty hardcore stuff (it's designed to withstand an immense amount of punishment and still maintain a seal), so it smelled pretty bad. It took a couple hours to air out the kitchen afterwards. Everything seemed great and I laid it down on top of the controller and lined it up perfectly, before quickly putting in the bolts. Unfortunately, we didn't get bolts that were threaded all the way up the shaft... This would have been fine except the bolt was long enough that even with the bolt tightened to the very end of the threads it wouldn't clamp together the controller and chill plate.
As soon as I realized this, I rushed off to find one Vice Grips and C-clamps, the next best solution to apply pressure until the silicone cured. It kind of worked, but after about 15 minutes of playing with it, the silicone had started to cure without any pressure being applied and I decided to do it right and start over.
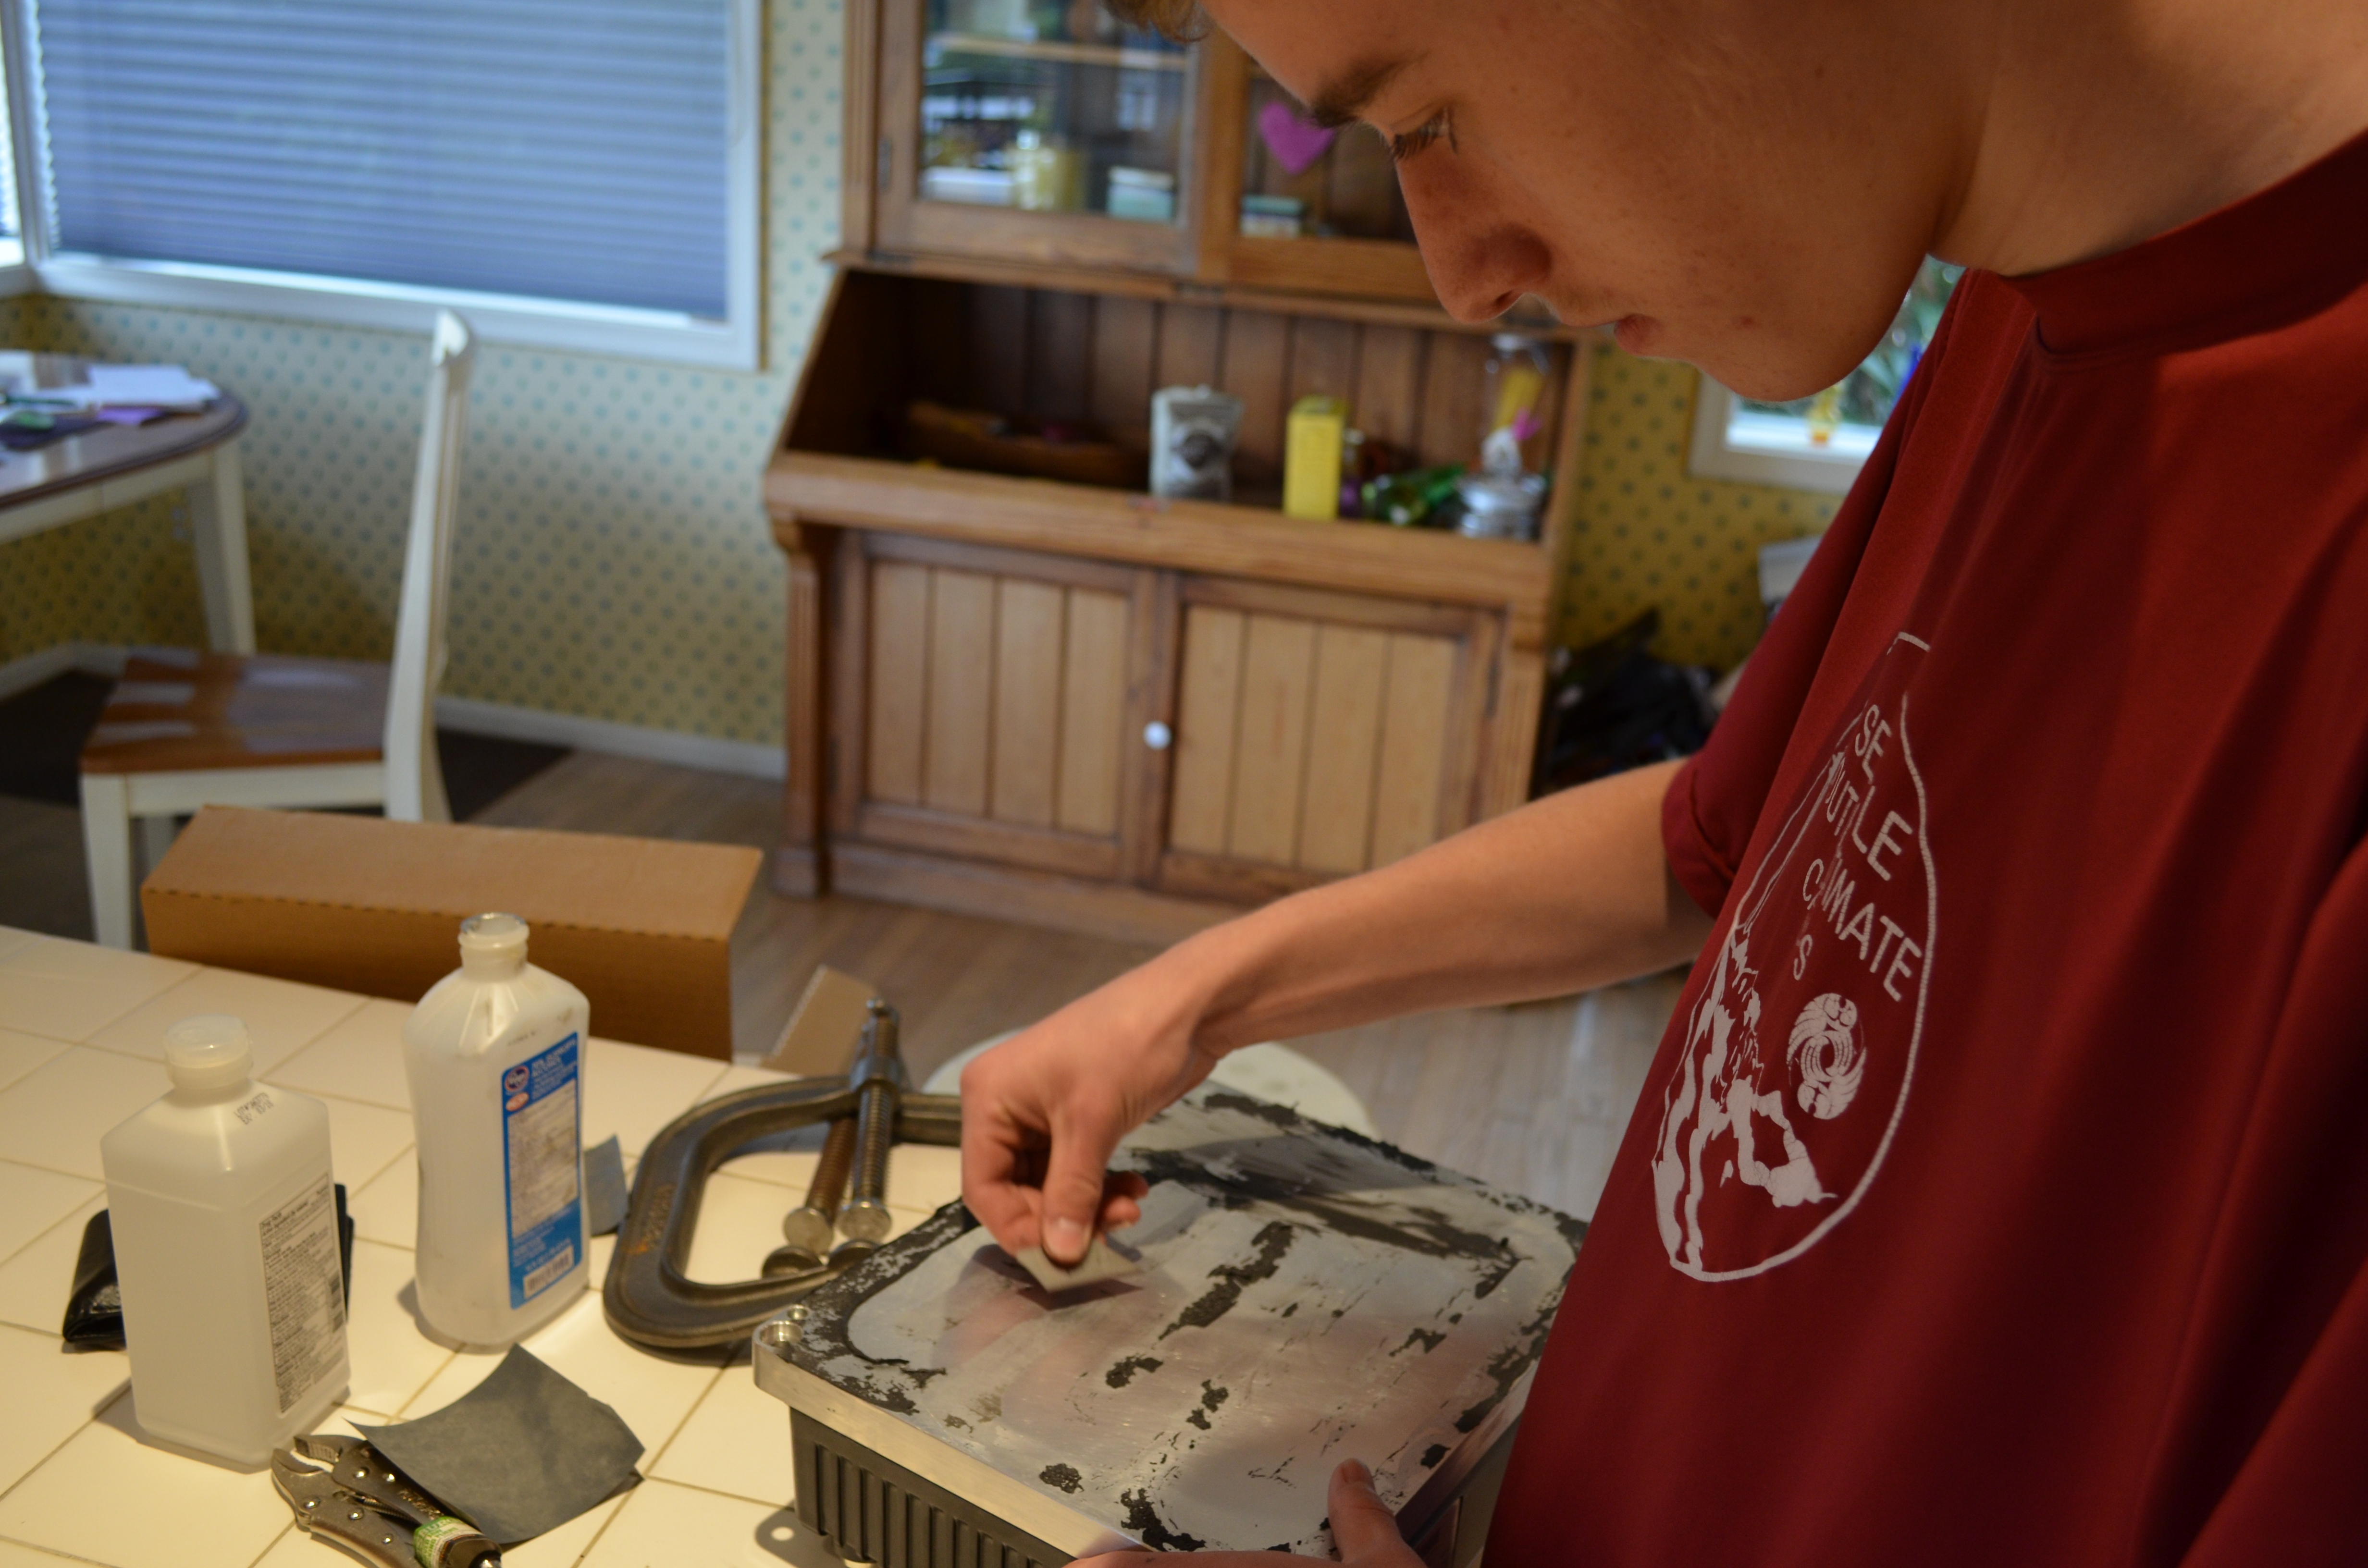 Removing the old silicone from the controller after I decided to start over. Keen observers might note the forlorn look on my face. I am mourning the loss of a whole tube of black silicone. Not a total loss though… I learned to always check your bolts before doing anything to permanent!
I ended up having to wait until the next weekend to finish it because none of our local hardware stores sold the exact silicone we needed. But in the end, it turned out much better and I was satisfied with the results. It probably would have worked without redoing it, but I didn't want to take any chances and it would have irked me to no end.
The second order came in well after the first and was just as exciting (if not more). The batteries, charging station, charger, cabling, DC/DC converter, and so much more was contained within the glorious confines of many a cardboard box and one big wooden crate. I won't detail every component until it gets installed, but a list of some of the bigger components from both orders can be found here.
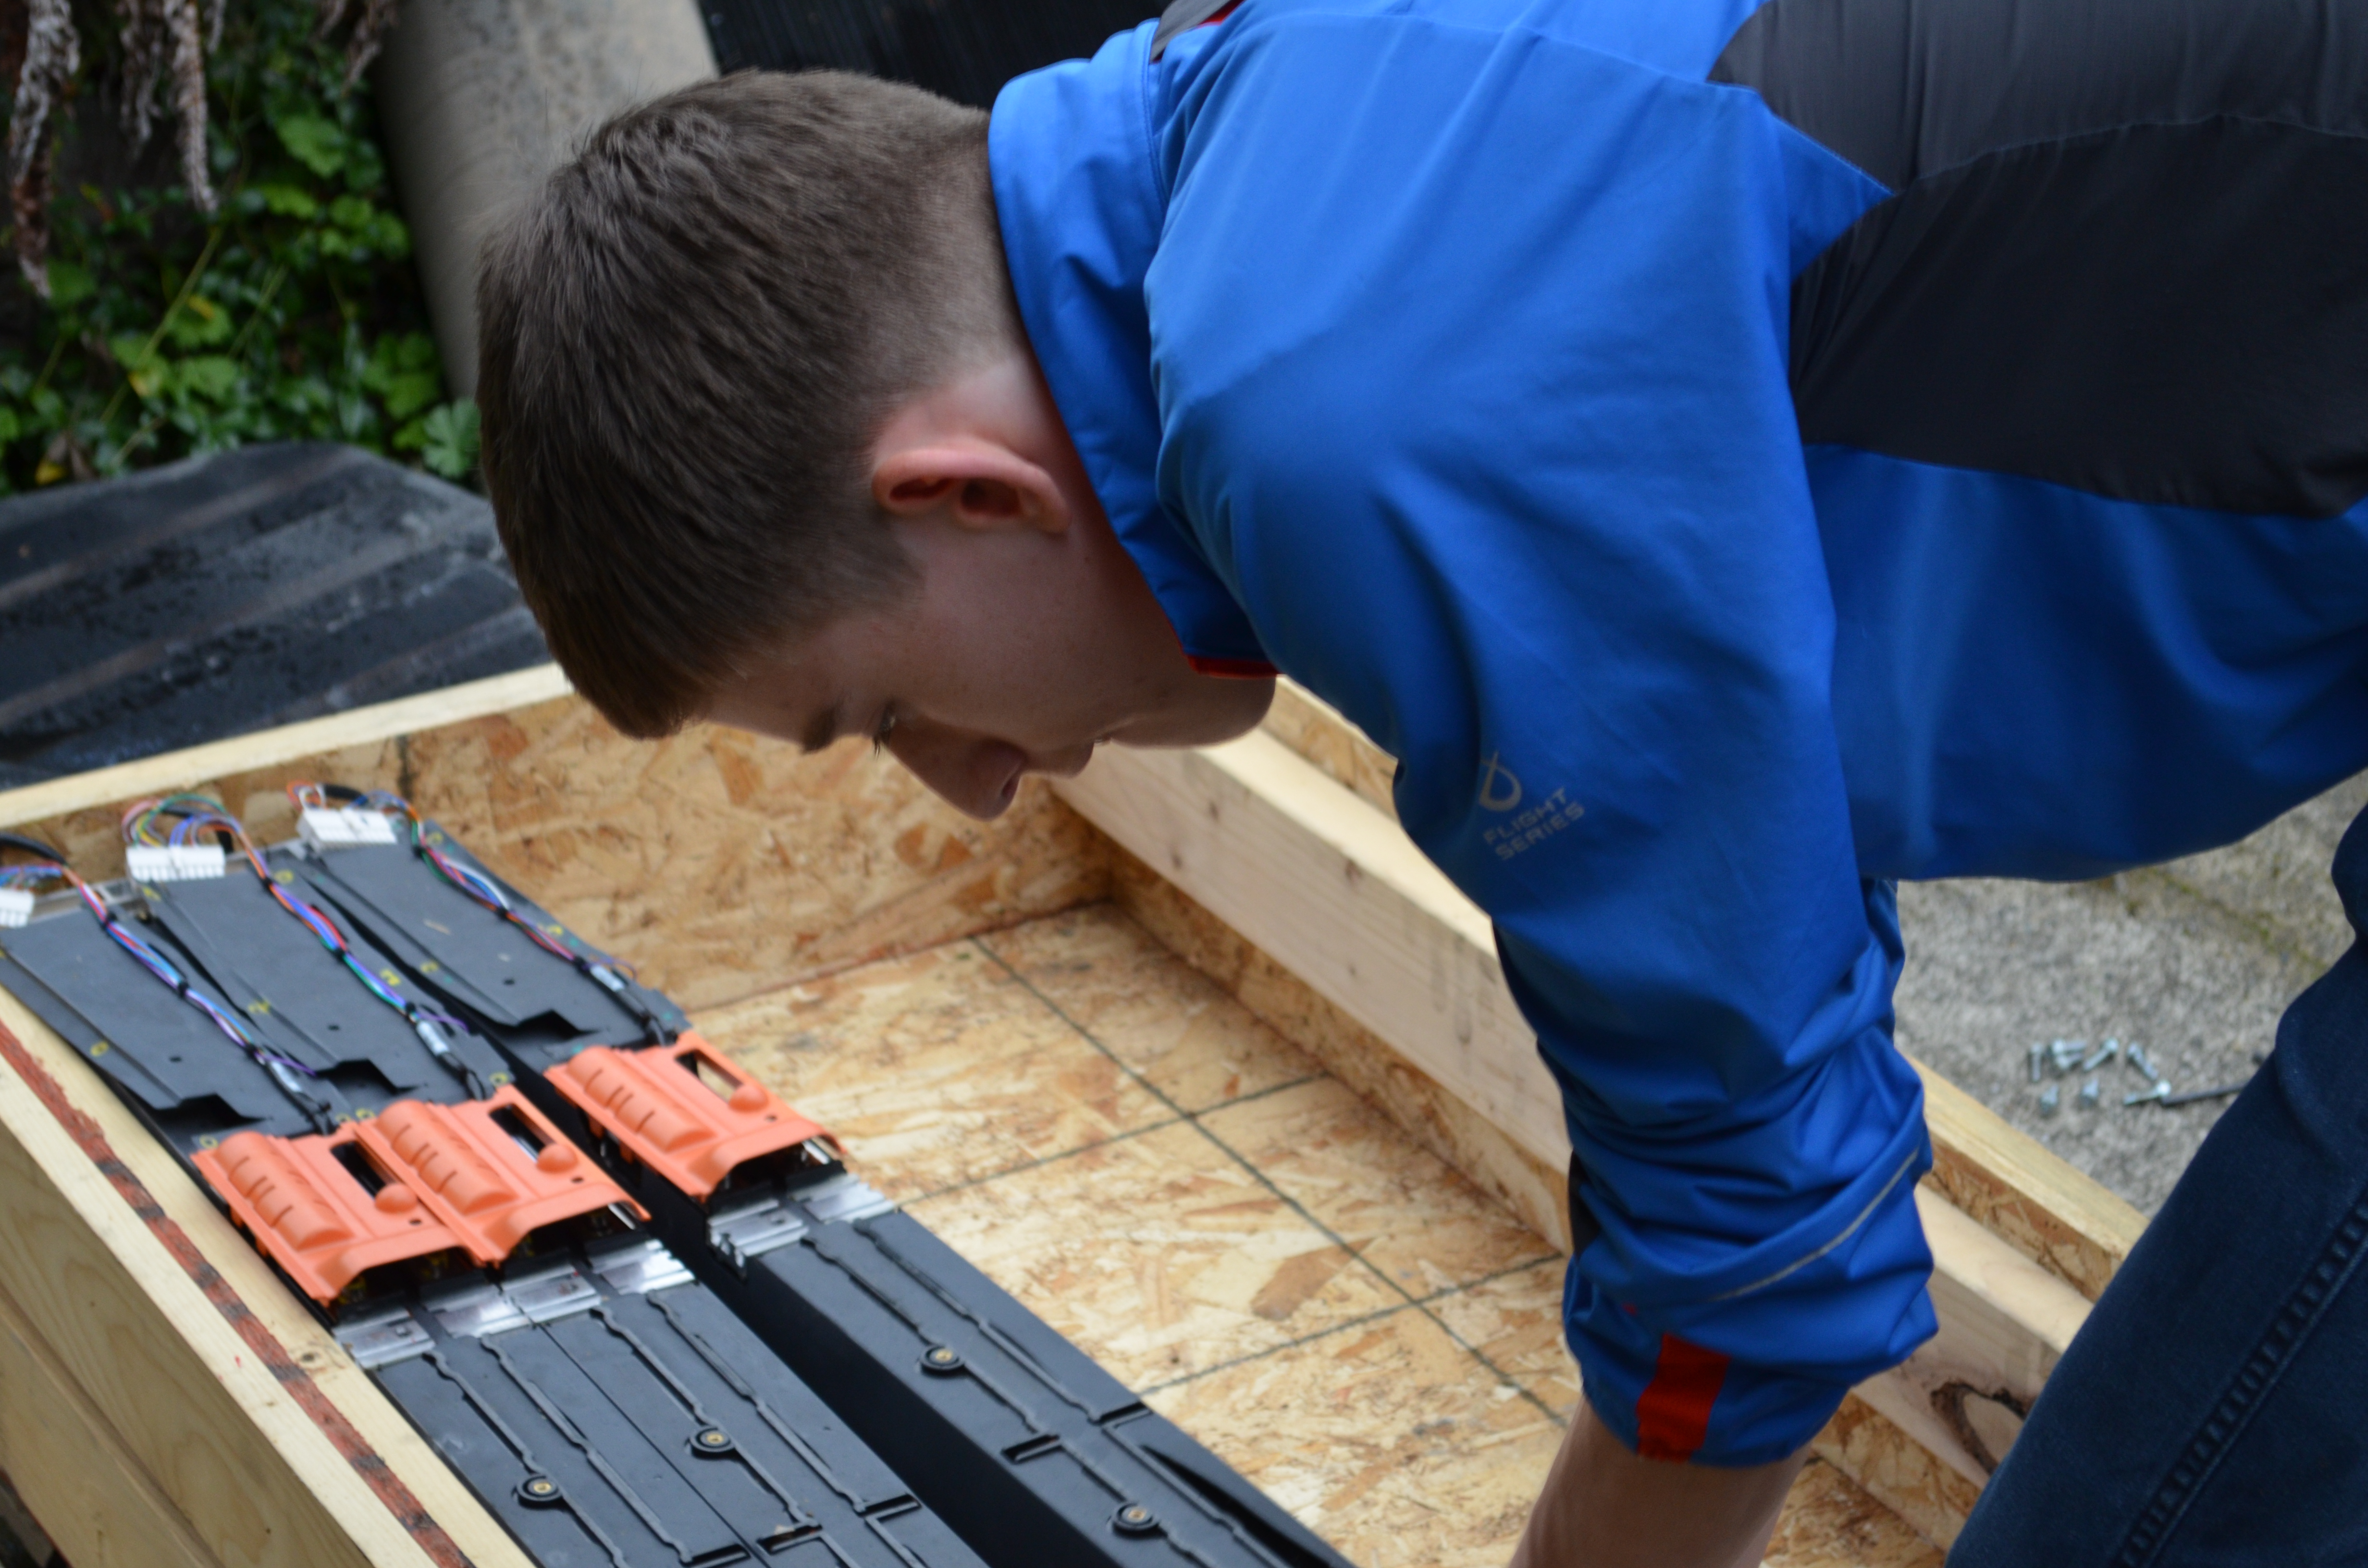 Moving the batteries indoors. Batteries don’t like the cold very much and while they’d probably be fine, better safe than sorry (plus we have more room inside than in the garage).
We moved most of the stuff into the house so that it could be in a more climate controlled environment until we are ready to put them in the car. At least thats what I'm telling people. Really, I just want to look at all the fancy components. I mean just look at this billet aluminum throttle controller! It's a work of art!
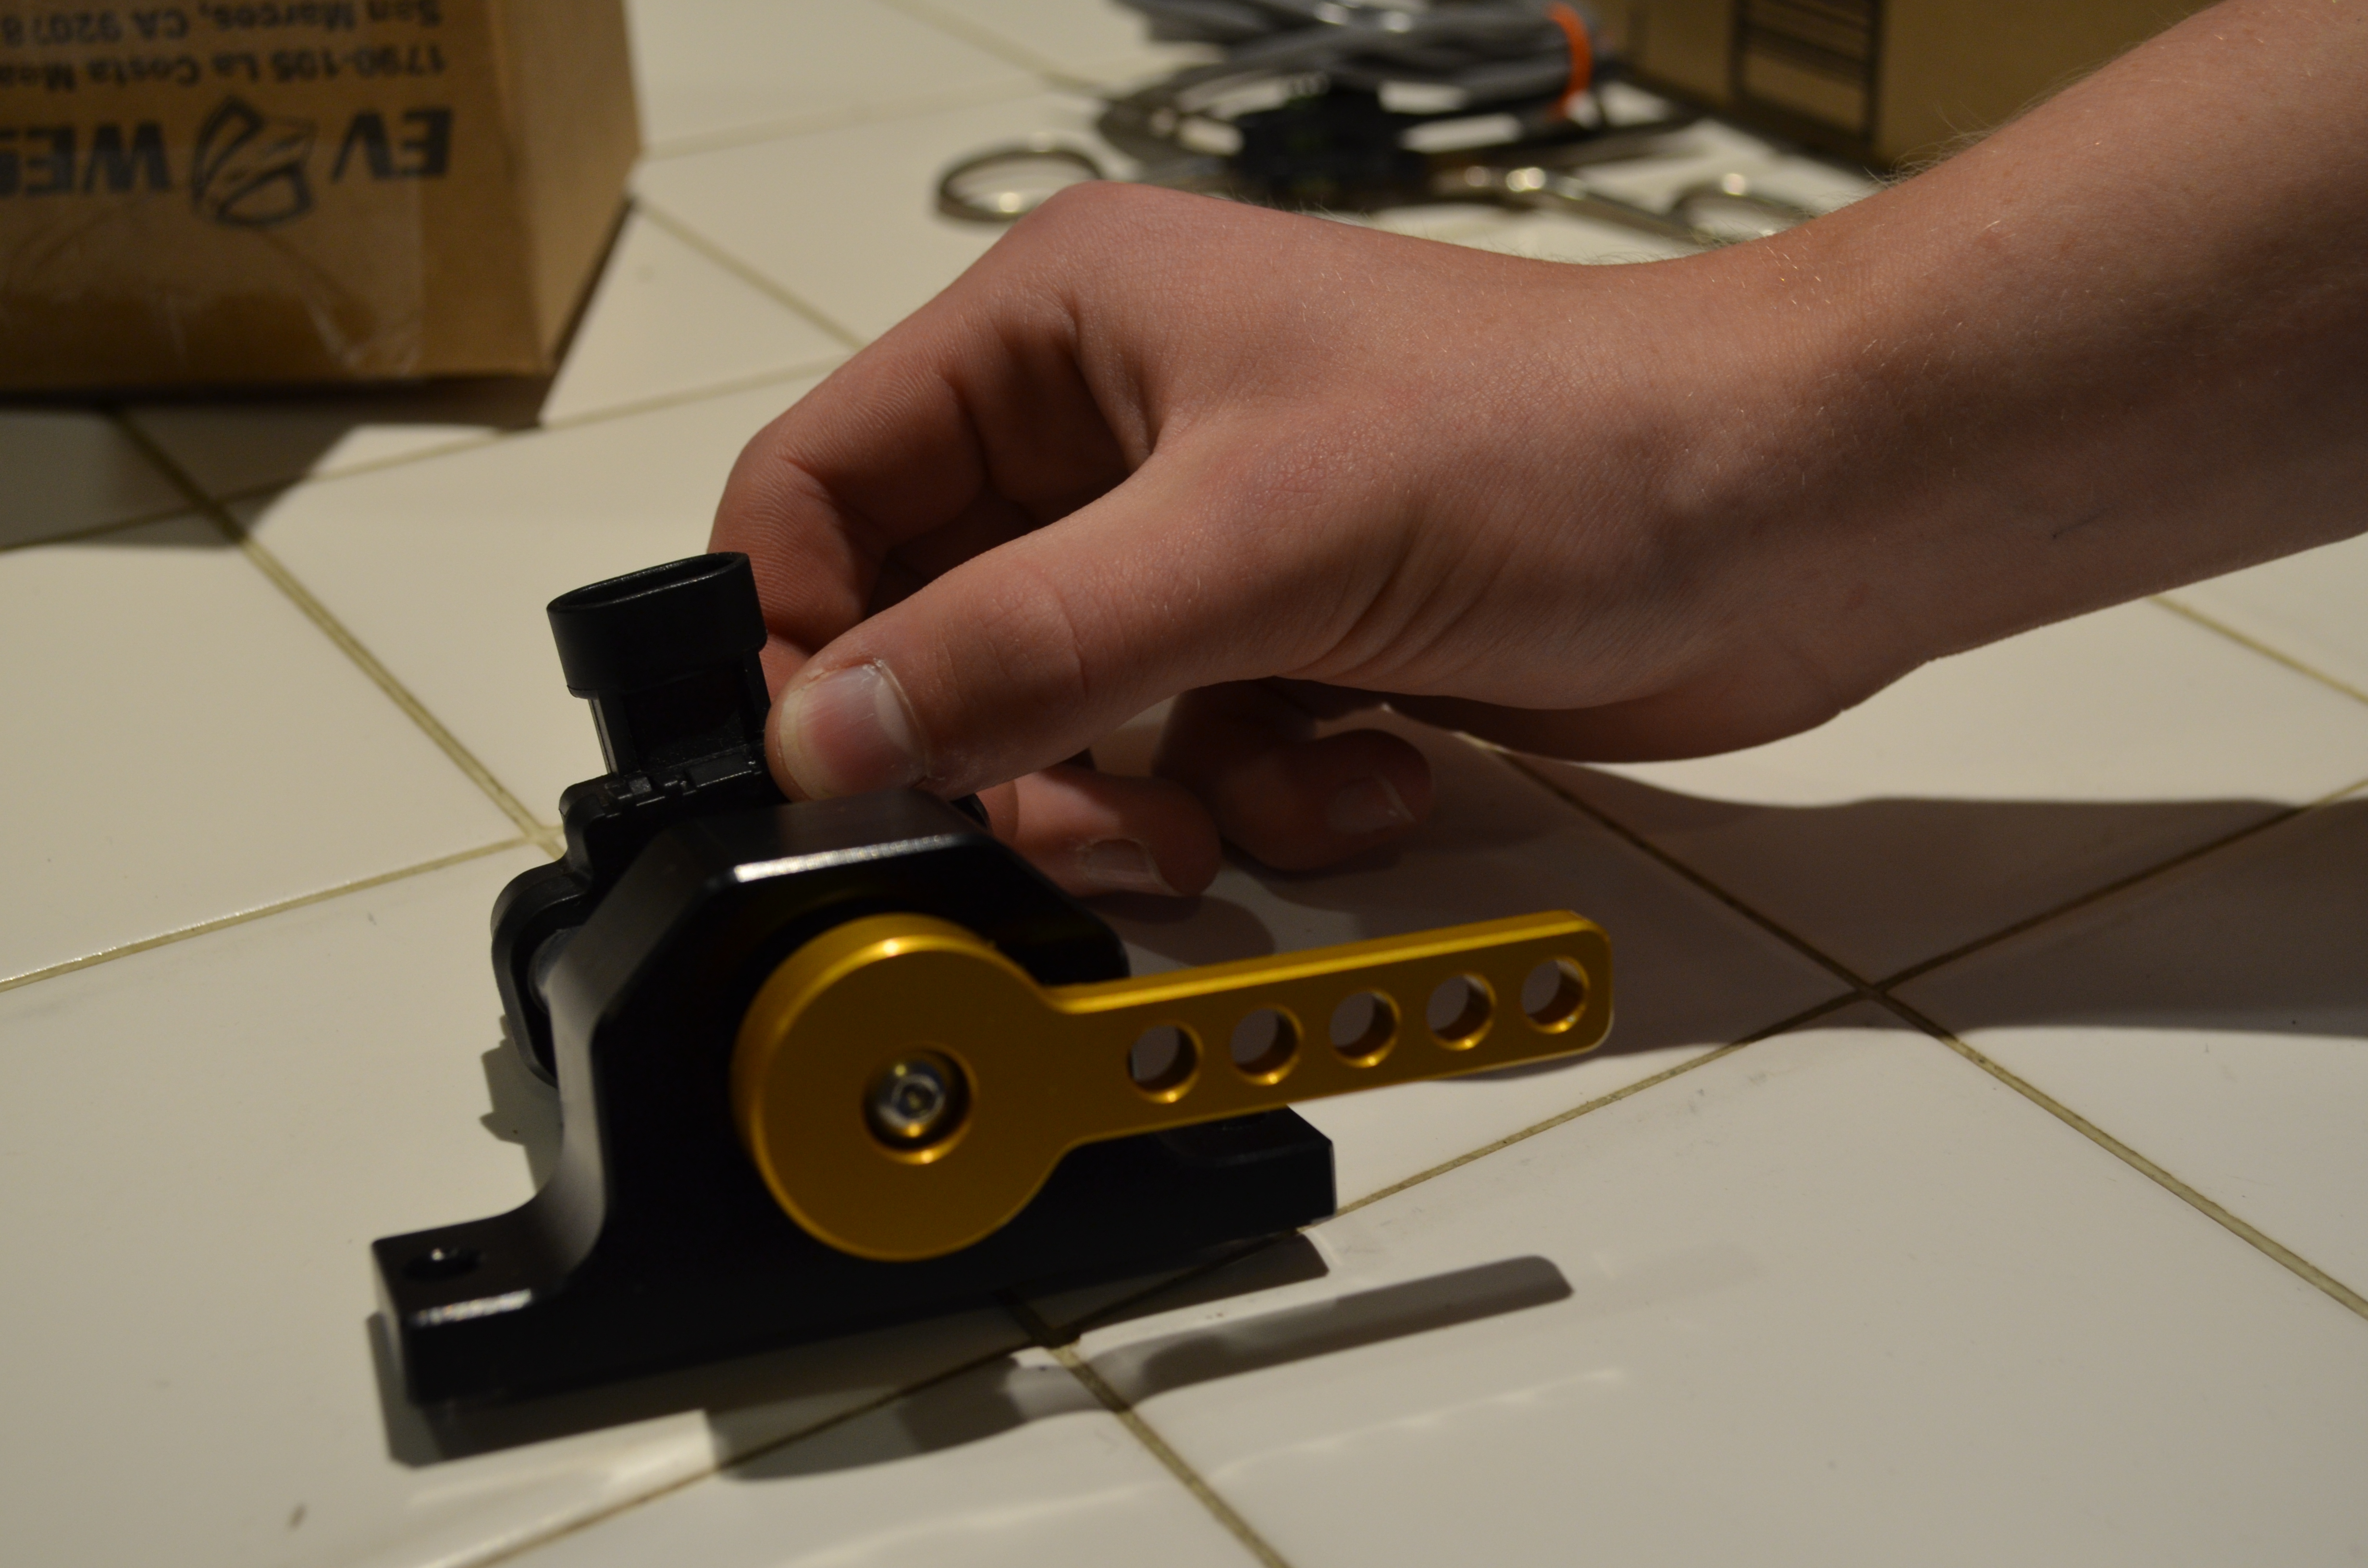 Magnificent, anodized gold, throttle controller. Yes, I’m totally geeking out.
Anyhow, that's about all for now, the project is now in full swing! More posts to come soon.